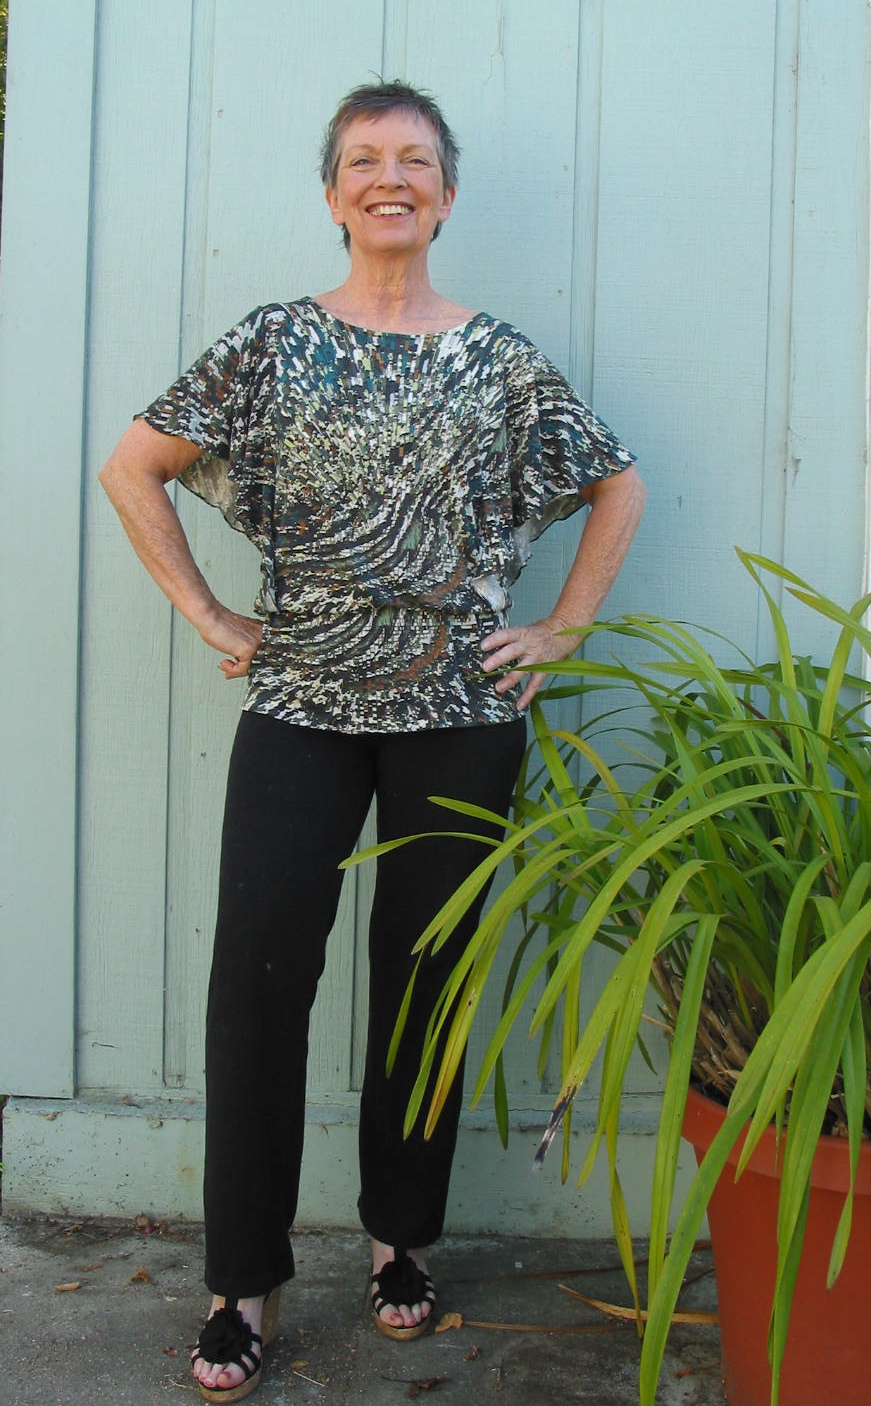
It's about exploring and sharing my creative adventures (mostly sewing these days) ~
~those activities that sometimes obsess, usually inspire, occasionally frustrate
~and always provide a delightful maze to wander through.

Sunday, October 16, 2011

Starting a New Relationship (ReVisions Peony Vest)

This pattern has been winking at me from my stash for well over a year now, and finally, I winked back.  Actually, we're officially dating now.  I've been sewing a number of fairly ordinary pieces lately, and my creative juices were longing to come out & play, and Diane Ericson's ReVisions Peony Vest seemed like just the right playmate.  My play time in the sewing room has been rather limited lately (hence the lack of blogging, if anyone noticed), so a relatively simple vest, with a lot of room for creativity, seemed just the ticket!

This pattern only has a few reviews over at Pattern Review, & some were rather negative, but I was finding pictures of finished pieces elsewhere on the web that looked absotively inspiring!   And each one completely different from every other one!   I was seeing a LOT of room for playfulness.

After pulling a few fabrics that I thought I wanted, and going "nope....not this one....nor that one....nope...." all of a sudden the right combo practically jumped right on my cutting table.   A supple, salmon-colored pigskin & a yummy golden silk/cotton looked like a perfect pairing.   A rich, coppery silk for the lining.  And what's this?  A fruity, flowery silk charmeuse - one of the very few fabrics that somehow made it through all of my purges from my previous sewing life....this piece has to be over 20 years old!   Perfect.


I LOVE every one of these fabrics, & knew that there was going to be a lot of playing around with placement, & not a lot of room for mistakes & unpicking, so a muslin was definitely in order.

Did I say relatively simple?

Two (2) muslins later, I was finally ready to cut into my fashion fabric.

Two (2) more FULL evenings of laying out pattern pieces & cutting later, and I still haven't stitched a stitch!  Well...I did do a test piece, which only brought up more how-to-do-this questions....but still, every good, lasting relationship takes a little work, and I AM having fun!  Really, I am.

A total of 18 pattern pieces, plus a few yards of bias cutting (on slippery silk charmeuse, no less), with little tweaks & added darts & fitting alterations and....oh, yeah, doing it all late at night..... this may take awhile, so it's going to be one of those multiple blog posts items.

Lining, Side Pieces, yards of bias, & pigskin
That picture makes everything look so....non complex.   That took me two full evenings???   In my defense, I have learned to go uber-slowly when I'm sewing late at night.   We all know what can happen when you're tired and you start rushing....

And I interfaced the pigskin - it was so stretchy that I felt it needed some stability.   It's times like that when I think one of those large pressers might just be a good investment!   Also, this was the first time I tried making a continuous bias strip....maybe, now that I've done it once, it will actually save time the next time, but trying to figure out how to best do it (remember...late night sewing....) took for-friggin'-ever!

I did play around with a test piece - piping in the seams.   I will be doing this; but I'm not sure about the details yet:

All in all, I do believe there's hope for this relationship.  I really think I can make it work :)

How are your sewing relationships going for you these days?   Do you prefer the one-night stands?  Or do you savor the long-term ones, with their inherent ups and downs?


Monday, October 3, 2011

What's with all of the Malware Warnings?

Is it just me?   For over a week now, every time I click on certain blogs, I get a warning sign that says "WARNING!  Something's not right here... ***.blogspot.com contains content from hungryzombiecouture dot blogspot dot com, a site  known to distribute malware" I just clicked on a new post from one of these sites, and the malware warning also points to adventuresindressmaking dot com as a malware carrier.

It doesn't matter if I click from my Dashboard, from Google Reader, or from my blogroll, I get this message.

I haven't been keeping track of the sites this happened on, but today it happened when I clicked on  Stepalica and Lucky Sew and Sew's blogs.   I don't want to continue to their site & get their email addresses, so I can't send messages & ask them if they know what's happening.

I have never had a virus issue since I switched to a Mac, so I'm not too concerned for myself, (hope I don't need to be!), but I am concerned for the folks who might be infected.....   Is anyone else getting these messages?  Is there anything that I, or we, should be doing about this?

Thanks for any advice.....

ETA:  A response (I don't think it's directly from Google, but from someone who appears to know what's going on) over at the Google help center:


"There is a widespread issue occurring with Blogger currently.  What happened is there is a 3rd party utility from blogutils . net that is used on many Blogger sites  and  blogutils . net  got hacked and the utilty started returning malicious code.  Just about every Blogger site using that utility got flagged.   blogutils . net  has cleaned up the hack and the utility is no longer returning malicious code, but any Blogger site which got flagged by Google will continue to show the warning until a malware review is done by Google and the site is cleared."


ETA.1:  Shannon at hungryzombiecouture.blogspot.com is now malware free!   (See comment #31 below).   Hope the rest of the infected are able to clean things up as well :)

Saturday, October 1, 2011

Style Arc - Linda Stretch Pants (at LAST!)

Did you see the movie "The Sisterhood of the Traveling Pants?  It was a story of four girls, with four completely different body shapes, and one pair of magical pants that fit each girl perfectly.  With all of the reviews of these pants coming from women with utterly diverse body types, and pretty much unanimous rave reviews about the fit, I can't help but wonder if there's something magical going on...

So of course, in continuation of my Style Arc binge, I simply HAD to include this pattern, in the hopes that it would fit me as well as it does everyone else.


The suggested fabric (and enclosed fabric sample) is for a stretch bengaline, which is a woven fabric with just a small amount of 2-way (not 4-way) stretch.  It is apparently easily available in Australia, but not so much in the U.S. (at least in good quality), so us poor non-Aussies have to make do....  I had a mystery fabric that was a nearly perfect match for the sample, albeit a bit thinner & with more drape.   Sadly, my (nearly nonexistent) fabric cataloguing methods left me totally clueless about what this fabric was :::eyeroll:::  Especially since it really is a great fabric for these pants!

I swear I'm going to change my ways.   Definitely.  With my next fabric purchase.   For sure.

The first thing I did was compare the pattern (size 10, in my case) against my best-fitting pair of RTW stretch pants.  The most notable difference was that the Linda pants had a much wider back piece, and a longer crotch curve in the back.   Was this the magical fit secret?  The overall sizing appeared to be good for me, so I carried on, & cut them out exactly per the pattern, except for the length...

Note on the length:  I'm 5'4" (almost) & my legs are proportionately short, so I chopped off almost 3" from the length.  (they allow for a 2" hem)  I did not allow for how much fabric would be taken up by my *ahem* thighs, so I ended up with less than an inch for hemming - I'll leave more next time!  (Yes, there will be a next time)   I would say the length allows for a 5'5"-5'6" person; if you're taller, or have long legs, definitely add more!

There are 3 pattern pieces:  Front, back, & a folded waistband that is the same for front & back.  There's a nice little tip about the recommended stitching sequence in order to "improve the crotch shape".   (Sew the inside legs together, then the crotch seam - back to front, then the outside leg seams)  I'll believe their method, because something sure seems to work!

They do say to use a "stretch thread" - I'm pretty sure what this means is a "stretch stitch".   I used the zig-zag lightning stitch on all of the leg seams, and a long stitch, followed by serging, on the waistband.

The waistband calls for adding 2" wide elastic (optional).   Given the stretch of the fabric, you could possibly get away without using any elastic - I considered this, but ended up using 1-1/4" elastic.   Partly because I didn't really want elastic THAT wide; partly because that's what I had...you know how it is....

I stitched it into the top fold of the waistband, like so:
1.25" elastic & folded waistband

elastic placed near the fold

elastic stretched & pinned in place 

Stitched along the top fold
I then basted the waistband in place, to check the fit - pretty darn good already!  The waist sat a little high on me, but then my waist to crotch ratio is on the short side as well.   So I trimmed 1/2" off the back of the pants, tapering to 1/4" in front.

These pants could easily be a quick evening project, start to finish, but of course, if you follow my sewing progress, you know by now that I'm going to find something to do to make it a little more challenging....

In this case, the RTW pants I was comparing these to had a little hidden zippered pocket at the waistband, and I decided that would be a fun addition.   Which is why, instead of finishing these in one evening, they took 3.    The fuzzy brain that goes along with late night sewing was a contributing factor in taking so long to figure out the logistics, but I did end up with a workable pocket.  Finally!

If anyone wants to tackle it, (or improve on it - please do let me know if you find a better way of making a pocket like this work) here's what I did (apologies for the fuzzy photos):

  • I used a C&C invisible zipper (it's what was available on short notice - next time I'll find a sport zip w/ lighter, smaller hardware; this was too bulky!
  • I cut a length about 4.5" - too short by the time I secured the end & had it sewn in.  5.5" minimum next time!
  • Sew the waistband on with a long stitch (to be serged later) & leave an opening for the zip.
  • Sew one side of the zip to the waistband, the other to the pants top


  • Cut one piece of fabric for your pocket - I serged the edges
  • Sew the top of the pocket to the waistband seam and the zipper tape, so that your seam is made with the following layers:  the 2 raw edges of the waistband, the zipper tape, and the pocket top

Pocket laid in place

Pocket flipped up
  • Serge the waistband to the pants, making sure you don't catch the lower zipper tape in the stitching.   It got tricky around the zipper pull (note the blank, unserged area), but I figured this would all be nice & secure when I topstitched the SA in place.
  • Note:  I really should have used a wider serge stitch -  it wouldn't have helped my issues of getting around the zipper pull, but it would have helped with the topstitching!
  • Clearly, I need to learn more zipper techniques to avoid this issue in the future!


Finished Zipper, open....

And Closed.
Next, I just sewed the pocket in place around the edges - you can see the stitching on the outside, but it's pretty subtle with a good thread match.  There is a bump where the zipper pull hardware is; I want to check out some other zipper brands, since I think this whole technique could work well once I get it figured out.   I would also place it a little more towards the center, so that the zip pull doesn't sit right  above my hip bone.

The 3-finger pocket.
I don't think any pickpockets are going to pull a fast one on me with these pants!  ;D
I would definitely want to add an inch in width, but still, the pocket is big enough for a key & a credit card, or even a cell phone :)
And....ta Dah!   The finished product:


This is not how I would normally wear pants like this, (shirt tucked into stretch pants = not such a great look) but I wanted to show the fit details, and it's not like anyone but my closest web friends will ever see this picture, right?

Bottom Line?  The Sisterhood of the Traveling Linda Pants has been carried on!  I'm very happy with the fit overall.   (My tummy is a different matter, & it isn't even Thanksgiving yet....rats....But that's what stretch pants are for, right?)  I'm not really sure how I can improve on this fit - if anyone sees any solution to the existing wrinkles, do let me know, but overall, they're super comfy & I WILL be making more!  I'll definitely cut them a bit longer, & will try them in a slightly heavier fabric.    And I won't bother with the pocket in all of them, although I do like my pockets.....

I think it may be time for a bit of Style Arc break for awhile.

That is, unless my Jilly Jeans arrive tomorrow.   I mean, JILLY Jeans?   What choice do I have, really? I know they weren't really named after me, unlike the shaza pants, which really WERE named after our very own shams.

Which makes me wonder, has anything ever been named after you?   Any interesting stories out there about your namesakes?

Thursday, September 29, 2011

Style Arc - Fabulous Freda Wrap (fun & fabulous it is!)


Ok, so it's a summer item, and it's (theoretically) now Fall.   But I have good reason for that....actually, two good reasons.
#1.  Summer has FINALLY arrived in the Bay Area California!   The weather is usually nicer here in September/October, but seriously, we had NO summer this summer, and right now (6:00pm) it's 80° outside.   And the sun is shining.   If only I had a pool..... Of course, this weather won't last....
#2.  I actually finished this wrap a few days ago, before this glorious weather hit, and my ulterior motive was to create a tropical vacation (at least in my mind) - I'm dreaming of a tropical trip next year, so I figured I might as well sew for it!   It's nice to have this weather now, but I want more!   I should sew a swim suit too.......

I just love me a fun wrap or shawl, and this one has just the right touches to make it more versatile than a plain old rectangular bit of fabric - a seam in just the right place, & some elastic placed just so, make for the perfect beachside coverup ....and more!

I chose a silk/cotton voile with a linen look from FabricMart.  It's very lightweight, and I loved the looks of the pattern, but it had two minor problems:   It was too narrow, and this wrap could actually benefit from a fabric with a bit more drape.   The narrow issue was easy: I just added a 4" panel to each end of the wrap.   I tried to sort of kind of match the print, but it's just busy enough to not matter too much.


As far as the drape, this fabric might soften a bit over time.
It has a tendency to do the same sort of bunching at the back both when tied above the bust and at the waist, but it's possible that a couple of well-placed darts might work.   I might play with the thought.   Later.

There isn't really too much to say about the construction, since it's uber-simple. Sew up a seam, insert elastic, and finish your edges.  Of course, true to form, I have to create a little something that's going to take more time... in this case, it was just the addition of the panels.   I used French seams, because the fabric is pretty thin & a bit sheer, and finished all my edges with a rolled hem.  This is a piece that takes more time to cut than it does to sew!

Now the fun part!  Depending on your fabric, you can have a comfy beach coverup:

Pull it down to your waist, toss on a top & some shoes & stroll over to the bar:
Note that I have it tied off center -
you can place the tie anywhere for an adjusted look

Or even add some accessories, heels (and a slip), a great belt, & go out to dinner (sorry, no picture of this option....maybe later....)  I think it's a perfect tropical or pool destination travel item, especially if you make it in a non-wrinkly fabric!

Another suggested option is to make it from terry for an after shower wrap - I rather like that one, for certain lifestyles.....

Now all I need is a tan & a tropical vacation....

Linda Pants are next!  I had to add a little time-consuming extra to those too (a pocket), and since I've only been doing late night sewing recently...well.....you can fill in the blank here....

Wednesday, September 28, 2011

Style Arc - Bali Bindi Top (Fail)

This was the first pattern in my latest little Style Arc binge.   I see many more SA patterns to be sewn on the horizon, but  unfortunately, I don't think this one will be repeated :(

To start with, this top is REALLY oversized, and I'm moving AWAY from oversized tops, not back into them!  I loved the sleek look in the pattern drawing, and the unique curving on the hem:

But when I pulled out the pattern pieces (Sz. 8) they looked HUGE.  Massive.   Gigantic.  So I started out by folding out about 1/2" front and back centers (for a total of 2"), but after I had the sides sewn up I removed even more from the side seams.     I don't even know how much I removed by the time I was done.   A lot.

And then I shortened it by about 6" (this, after I had already sewn on the hem band).   I just sliced off the bottom, rather than unpicking everything, so I ended up with a narrower hem band than called for.

I should also mention that I really didn't like the fabric I was using, an unidentified knit; probably a cotton blend. It has horrible recovery, and I didn't like the color much either  - it was $2/yrd stuff from Happy Stop, & I swear it was a different color in the store than it was by the time I got it home!   At any rate, the remainder is going in my "giveaway box".

Once I saw the pattern pieces I figured I might as well use practice fabric - glad I did that, although I DO think this top would work better in something else.   Wish I could tell you what.   The sample that came with the pattern (this is a FABULOUS touch that's included in all Style Arc patterns) appears to be a thinnish poly knit, an ITY perhaps?  I don't like the feel of ITY, so I've never sewn with it.

What I did like was the concept of using a knit for the body, and a woven for the bands.  The neck band, however, is cut on the cross grain, and IF I were to make this again I would cut it on the bias.  The neck band gaped a bit, so I took a couple of darts in the band - I did a lousy job, but at this point I was treating this as a probably-unwearable test piece, & didn't much care.

Going backwards, this pattern also had some confusing instructions (but I want to be clear that Style Arc is really paying attention to the fact that so many home sewers are having troubles with the instructions on their older patterns, and the instructions are now being fleshed out, and they are including instructional drawings - I do highly recommend the company!)

The sleeve & neck bindings are simple bindings, but there are some potentially confusing instructions; i.e.:

  • "Join the sleeve trims and the neck trim" = Sew up the ends of the neck trim, forming a circle.   You can't do this to the sleeve trims yet though, because the sleeves are sewn in flat.
  • "Turn to the right side and edge stitch back to keep the inside seam flat."  Based on pictures of a finished garment that Chloe sent to another person who asked about the instructions, I think what they mean is just to top stitch close to the edge, as pictured above.
The hem binding has some more confusing instructions.  Based, again, on pictures that Chloe sent, and conversations with other sewists, here's my interpretation:

  • "Stitch the outside edge of the front and back hem contrast seams together, turn to right side and flat stitch."  The front and back hem band consists of two matching pieces for the front, and two for the back.  You stitch each set together along the bottom edge (RS together).  The SA Dictionary defines "flat stitch" this way:  "A row of stitching on the correct side of the fabric close to the edge of the seam, this keeps the seam flat"   I would call this a topstitch, but the pictures that Chloe sent show this seam edge stitched along the inside seam allowance  - so that the stitching only shows on the inside of the garment.   This is how I would do it (but I was getting lazy in my techniques on this top by now, so I didn't bother.)
  • The rest of the instructions make sense (to me, anyway).   They are simply to sew the hem band to the body of the shirt, and "flat stitch" (i.e., top stitch).  I serged all of the seams.   (Chloe's subject pictures also showed serged seams)


Here's my finished top.   The pants I'm wearing, btw, are the Style Arc Linda Stretch pants (still unhemmed and unfinished, so the review will be coming up soon - and this pant is a huge THUMBS UP pattern!)

Interesting how the folds in the fabric & the way the top hangs
make my bust look rather...ummm.... ample, isn't it?  Because I'm not.


This is a pretty simple top, and if the style and sizing works for you, I would say go for it!   I really thought that I would figure out the alterations I needed to do & try again, but now that I see the finished pictures, I don't think it's worth spending my time on - too many other great patterns out there, & I realize that I really want to be focusing on more fitted lines.  This is a knock-around-the-house only top; I'm OK with that.

***Some Additional notes:
1.  Chloe emailed me after seeing my review on Pattern Review & said they were asked to do an oversized shirt to wear with leggings, but she thinks they went a bit too far with the "over" lol.   She also said they're taking into account the comments about instructions.   I tell ya, their customer service could not possibly be improved on - they really rock!!!
2.  My short legs & wide butt do not make this pattern the best choice for a flattering look on me.  I'm still learning how to transfer a pattern image to fabric on my body & knowing what will work!
3.  My fabric choices were not the best for this pattern:  a heavy knit with poor recovery, paired with a heft, tightly-woven trim fabric, could have been improved on.   A lighter, drapier knit, and a woven that has a bit more give, would be better choices, I think.

Coming up:  The Fabulous Freda review, and, as soon as they're finished, the Linda Pants review.

Sunday, September 25, 2011

Artists and Sewists and Fashion, Oh My! (Artistry in Fashion 2011)

Yesterday I attended my first Artistry in Fashion event, held annually at Canada College in Redwood City - it will NOT be my last time!

Some of the strongest impressions that I had:

  • The attendees were mostly women, probably mostly 30-ish on up, and I was struck by the fact that so many truly beautiful women were all gathered in one spot.   Not glossy-magazine beautiful, but beautiful in the sense that they carried themselves with confidence, dressed with attention to detail, and exhibited a creative, artistic flair in clothing and accessories that showcased an authentic attitude of "I know who I am".
  • The designer/artist booths!  Oh my gosh - overwhelm!  I think there were almost 100 booths, and every. single. one was filled with amazing artistry - clothing, fabric, jewelry, accessories.   It's juried, and done well!
  • The Canada Campus is a lovely one - especially on a warm & sunny day.  The designer booths were all outside (& me without sunscreen or a hat - yikes!)   Apparently quite a bit of construction has been going on there, & I think it will be a lovelier campus when some trees have grown up & brought some more natural beauty back, but it was a perfect place for an event like this.
  • Of course, the people/friends/fellow sewists!   It was such a great venue to keep running into people I've met through my local sewing group, meet some bloggers for the first time, and be introduced to some wonderful new sewing friends :)
  • I don't think I've ever been to a fashion show before....this may not have been an international runway event, but seeing the designers' works showcased, and Lyla Messinger's patterns presented, was really inspirational!  Lyla was the featured speaker, and while I missed her talk, I made up for it by inspecting everything in her booth (and chatting with her a bit, and, of course, spending some $$ there!)
I could have spent time taking pictures of the amazing work displayed & the lovely women I saw, but I pretty much forgot that I had my camera with me, because it was much more fun to just chat with everyone & play with all the goodies first hand ;-)

What I came home with:
My birthday present!   OK, it's not for another month, but birthdays are supposed to start early & end late anyway, right?  These are  felted scarves from harlequin feltworks, and I love love LOVE them!!!!    Made of all natural fibers (silk and wool), and with eco-friendly processing to boot.  It doesn't get much better than this!


Here are a few of the infinite ways you can drape these scarves:


I can't wait for scarf-wearing weather!!!!   By the way, many of the designers have lines that are carried in museum stores and higher end clothing stores, and the prices at this event are deeply discounted in comparison!  Update:  Holy Crap.   I just looked at the online prices of these scarves.  I knew I was getting a good price, and I'm not even going to tell you how much I paid, but I will say this - if you want an INCREDIBLE bargain on one of these scarves, come to AIF next year!

One of my favorite vendors was the button lady, "Missing A Few Buttons".  She has no web presence, but oh my gosh does she have buttons!  I could have spent a mortgage payment at her booth (readers may have noticed by now that I have a bit of a button fetish - especially if they're vintage)

I picked up a few glass buttons from the 1800's, and my favorite - some Victorian "perfume buttons":

What's a "perfume button",  you ask?  (I didn't know either).   The colored bits in the metal buttons are velvet, and the well-dressed Victorian lady would put a drop of perfume on the velvet, so that she could take a delicate whiff of her nice perfume as she walked through the sewage-filled roads of town.    I think I will say no more.....

And, as I mentioned, I stocked up on a few goodies from Lyla Messinger (LJ Designs):
Some patterns, a fun-looking Tips & Techniques book, and some Riri zips designed by Lyla (closeouts at a GREAT price, so I couldn't resist.....)
I usually avoid posting a pic that's THIS unflattering, but at least you'll get a sense of how quickly a warm, sunny California day can shift to freezing-arse cold evening when the fog rolls in with a chilly wind:
Trying to stay warm with shams...

And I can only dream of looking as elegant and gorgeous as Margy, even with a cold wind whipping our hair about:

Artistry in Fashion, I will return!   Until next year......

Thursday, September 22, 2011

I'm on a Style Arc Binge! #1 = Island Ali


The stuff of life has left me rather stitchless and blogless for the past couple of weeks, but I finally had some sewing time the last 3 days, and I dove head first into Style Arc Land!   Three patterns down, and more to come...
Island Ali Top
This was actually #3, but it's my favorite, so I'm starting with this one.  I LOVE the results, but I have a lot to say about the process...

First off, Style Arc in general, the Good:
  • Fantastic, personal customer service.  If you aren't sure what size to order (the patterns are one size only, not multi-sized, so you need to order the right size) just e-mail your measurements to Chloe & she'll help you out.
  • Really well-drafted patterns, with RTW fit
  • Great style!
  • Patterns printed on heavy white paper (or even heavier card stock)
  • You get one FREE pattern with every order
  • Fresh new patterns are available every month.
And the Not-so-good:
  • Sparse - REALLY sparse, instructions (Side Note:  I understand that they are now adding more detailed instructions, with drawings - Yay!)  (Side-by-Side Note:  I emailed Chloe with some comments & questions about the instructions, and received a delightful & timely response, with examples of the new instructions.  Great News!  They are REALLY listening to the concerns, and are not only making an effort to include wonderfully detailed instructions, with illustrations, but they will be going back over their older patterns & updating the instructions on them, as time allows)  Actually, this is the only 'not-so-good' I've found so far.   Oh no wait, one more, but it really has nothing to do with Style Arc, per se...
  • The patterns are relatively heavy (see above), and postage from Australia can really make you blink fast & think twice about how much you're spending!
Bottom Line:
  • Style Arc is a pattern company that deserves to succeed.   With patterns as stylish and well-drafted as theirs, and the passion for serving the sewing community they exhibit, they just flat out rock!
Back to Island Ali:  This top is really a pretty easy one to sew up, but I spent a ridiculous amount of time figuring out the little details that weren't in the instructions.   Some of the instructions are written on the short instruction notes, some of them are on the pattern pieces themselves (so you need to keep the pieces handy while sewing), and some are left to your own imagination, or experience.

Here's the top:
Cute, eh?
Step 1. is "Lay pattern on fabric and cut"   Really?   With everything you leave out, you had to include that one?   Sorry, I'm being snitty.   I LOVE this company, I really do, and I will definitely be ordering more patterns (probably many more), but there were so many OTHER steps I wish you would have included instead of this one!

Step 2. is sewing the shoulder seams.  Yup - logical & in total agreement here.  I did stabilize the seam with Stay Tape, as I always do with knits, but that isn't a step I expect the pattern maker to include.

Step 3. is sewing on the neck band.  I have only minor comments on this - the instructions say "Fold the neck bind in half and join and then stitch to the neck, turn inward to the wrong side of body and top stitch down with a 1/4 inch stitch".  Now, if you're really trying to follow instructions, this befuddles me a bit - if you have any experience sewing bindings, it's no problem....just do it your way, but if you're a beginner....well, I would be lost already.   Maybe it's just me (I do like my pictures guiding me!)  I stitched the ends of the binding together, and then folded & pressed it, so that the seam is totally enclosed.    A tiny little detail that COULD be written is "sew the binding to the Right Side of the neck, then turn inward"  I know, I know, it's a niggly little thing, & it does become clear when you read on, but still.....I'm just being all anal & detail-oriented here, so bear with me!

At this point I thought there was a lot of bulk at the seam line, so I pinked the raw edge before turning it.   
Binding Pinned in place

Edge pinked, and excess fabric snipped away from seam crossings

You now have a binding that's about 1/2" wide - if you top stitch at 1/4" (which is where I thought it best) you have quite a bit of extra fabric between the stitch line and the fold of the binding.   I would cut the binding a bit narrower next time (yes, there will be a next time - I do love this top!)

Moving on to Step 4. "Edge stitch the outer flounce edge."  I thought about this one, & read through the rest of the instructions, & realized that this was the only finish given for the hemline edge of the sleeve/flounce.   I decided to go ahead & edge stitch it (at 1/4" - this line is indicated on the pattern piece) & deal with the hem later.   This was my first mistake, but only because the pointed ends of the flounce are enclosed in the side seams, so any hemming needs to be hand stitched at those points.   You're better off, for a nicely finished look, to do any hemming at this point.  Later on, I did a rolled hem with my Featherweight,  pictured below:
I hadn't used my rolled hem foot on a knit before, but I was happy with the way it turned out.   When you do a rolled hem with one of these vintage feet on a bias cut, or curves, it can easily go wonky & wavey on you, but with the knit fabric, and on a flounce than can handle a bit of waviness, it actually worked quite well!  :)


Step 5.  "Stitch the flounce to the front body starting at the waist...." (bold added by me)   This was my second mistake.  The waist referred to here is indicated on the pattern piece, and  it is NOT the waist seam (where you join the skirt to the body of the top & add elastic....which is going to sit at your waist.....)  I stitched the flounce on from the bottom of the front to the bottom of the back, where the elastic seam would be.   Not a big deal in the long run, but the look would definitely be more refined if the flounce started and ended where the pattern marks indicate it should.

Really, I do rather like having the seam allowances marked on the pattern pieces, but could we have a little mention in the body of the instructions when you're supposed to match up some notches that are not otherwise obvious?    Thank you.   (again...hope I'm not sounding like a grinchy bitch here...really, truly, I DO love these patterns!)  Mostly, I'm making notes for my future sewing of this, and hoping to help any other sewists (particularly novices) avoid the mistakes I made.

Steps 6, 7 & 8 are about joining the side panels, the front & back body pieces, & the flounces, then attaching the skirt pieces.   All pretty clearly written...no issues here (*whew*) :)  Oh wait!  I remembered another point - the underarm edge (which is at the top of the side panels) is left raw.   If you want any sort of finish on it, do so before you attach the side pieces to the front piece.

Step 9. is "Cut and join the elastic to your measurement and stitch to the waist/hip seam"   Maybe they mean to stitch the elastic directly to the fabric, or maybe they just expect you to do it your own way... I dunno.   But I don't care for elastic that isn't actually inserted inside a casing, unless it's underwear (& even that is questionable)...maybe that's just me...at any rate,  this is what I did:

Cut a strip of fabric 3/4" wide (the elastic is 1/4") &  sewed one side to the seam that joins the body to the skirt.   I then trimmed the seam close to the stitch line.

I folded the casing along the stitch line, up towards  front & back pieces, & stitched the other  side of the casing (leaving the top edge raw)   I then inserted the elastic in the casing.

This shows the casing, side seams, and the bottom of the skirt with a rolled edge hem.  Note:  I didn't like the waviness of the rolled edge at the bottom, so I ended up turning the bottom hem up & straight stitching a hem.
There is no mention about hemming the bottom, or any more finishing on the flounce edges.   If you look at the drawings, you can see topstitching indicated along the side front & back seams  - no mention of this anywhere in the instructions.   (I didn't do it on this top, but it could be a nice look).

One change that I plan to make next time is to cut FOUR sleeve/flounces so that I can line them.  I'll join them RS together, turn & top stitch the outer edge.   Since the inside of the sleeve is visible, this would give a nice, finished look & you won't need to deal with that exposed edge/hem.

I think that's it.... hope my notes are helpful to anyone else wanting to try this top  - I really think it's worth it, and it's actually a pretty quick & easy top to make, once you know what you're doing!

The results:


I tried it tucked in & belted.   The lighting is poor on this shot, but I think the look works just as well as worn loose.   I actually also played with hiking the shirt up so the the elastic rides higher on the body, and that was a good look too, so there are wearing options here!

Next up (when I get some pics taken): the Style Arc Fabulous Freda, and the Bali Bindi top

Sunday, September 11, 2011

The Space Between the Thoughts


Today, may we find space in our hearts for a little more peace, a little more unconditional love, a little more awareness of ourselves and our relationships with others.

Feeling grateful for all of my opportunities, the friends (both seen and unseen) who surround me, and the freedom to choose how I react to anything that might happen.  May I make my choices wisely, and remember to involve the power of the compassionate heart.