I cut out 3 sets of jeans fronts to practice on, but after the second one, I was confident and ready to go! I totally credit Debbie Cook's Fly Front Tutorial, and Peter at MPB's Excellent Instructions for making it so easy! I started by practicing Debbie's method (which really simplifies the process), and then followed Peter's instructions (which add a number of helpful details). I took a bit of what worked best for me from each, then added a few tidbits of my own.
In short, I mostly followed Peter's instructions, but the whole process was made MUCH easier for me by adding Debbie's steps of basting the fronts together & using tape to hold the zipper in place (These are brilliant timesavers & results producers, IMHO!)
In the end, I did goof. All three times. But I finally understood my goof, with 20-20 hindsight. (more on this later, on the zipper shield section). And in spite of this, I'm pretty happy with the results!
My combo method, in Pictures:
Mark the Fly Extension Dot on both sides of both fronts - you'll be looking for it later! Interface both fly extensions, and serge the edges of the LEFT fly extension. (Note: I serged both extensions, but finally realized that it isn't necessary to finish the edge on the right extension; this will be cut off later). With RS together, baste from waist to dot, and stitch from Dot to Crotch point.

Open the basted fly extension seam and press (I press from both sides).

Topstitch close to the edge of the LEFT fly extension, from waist to dot.

Add a strip of tape (Debbie recommends Wonder Tape - all I had was Steam-a-seam, which was OK - flimsy, but OK. I'm sure the Wonder Tape is stronger) to each side of the zipper, from the bottom zip stop to the waist. Leave the protective tape strip on.

Place the zipper front side down, onto the Right Fly Extension, with the left edge of the zipper (as you are looking at it) aligned with the basted seam, and the bottom of the zipper stop about 3/8" above the dot. (you DID mark that dot, right?) Remove the protective tape from the right side of the zip, and finger press it into place (You want the zipper to end above the dot, so that you won't be sewing through any metal zipper bits when you do your topstitching)

Fold the left pants front out of the way - you will be stitching the zipper onto the Fly Extension only. (If you're like me, you will forget & stitch through all of the layers at least once - that's what unpickers are for, right?....). With a zipper foot, stitch one row close to the zipper coils, then, for stability, stitch another row close to the edge of the zipper tape.

This is the step where that basted seam really helps out! Pull your zipper to the left as far as it will go without moving that basted seam over, and smooth the left side of the zip into place over the left fly extension. Make sure there aren't any puckers (especially at the zipper stop end), remove the protective tape from your Wonder Tape, and finger press into place. Fold the pants front out of the way, and stitch the zipper to the Fly Extension, the same way you did the other half of the zip (one row of stitching near the coils, another row near the zipper edge) (You can get by with only one row of stitching here, down the center of the zipper tape)

Make a Template for your topstitching. A good width is 1" from the center seam for the first row of stitching, 1-1/4" for the next row. The bottom of your topstitching should end at the dot (remember that dot? The one that you marked on both sides of the fabric?)

Stitch through all layers - go carefully when you're getting near the zipper coils at the bottom! (and make SURE you aren't stitching over the zipper stop)

Now it's time for the zipper guard. I wanted to use my cotton lining fabric, & since it's a bit thin, I reinforced one side with some interfacing. The guard is folded in half, WS together; however, I wanted a finished edge look so I chose to first fold RS together, round off the bottom edge with stitching, and then turn it. (My camera battery died here, so I missed a few detail shots of inserting the zipper guard - I wasn't about to stop sewing & wait for a camera!)

OK, here's where you do as I (now) say, not what I did. The zip guard should be aligned with the right edge of the zipper tape, then you serge (or stitch) the edge, from waist to the bottom of the guard. I placed my guard too far to the right, & even though I did this on every test zip, & knew there was something off about the bottom end, I didn't 'get it' until reading Peter's instructions for the umpteenth time....& there it was in black & white. Once the guard is sewn on, flip your garment to the right side, and reinforce the top stitching just below the zipper, and on the curve, through all layers to secure the zipper guard. I don't think there's a perfect spot for this reinforcement, or bar-tacking - I noticed that every brand of jeans I have places this reinforcement in a slightly different spot.

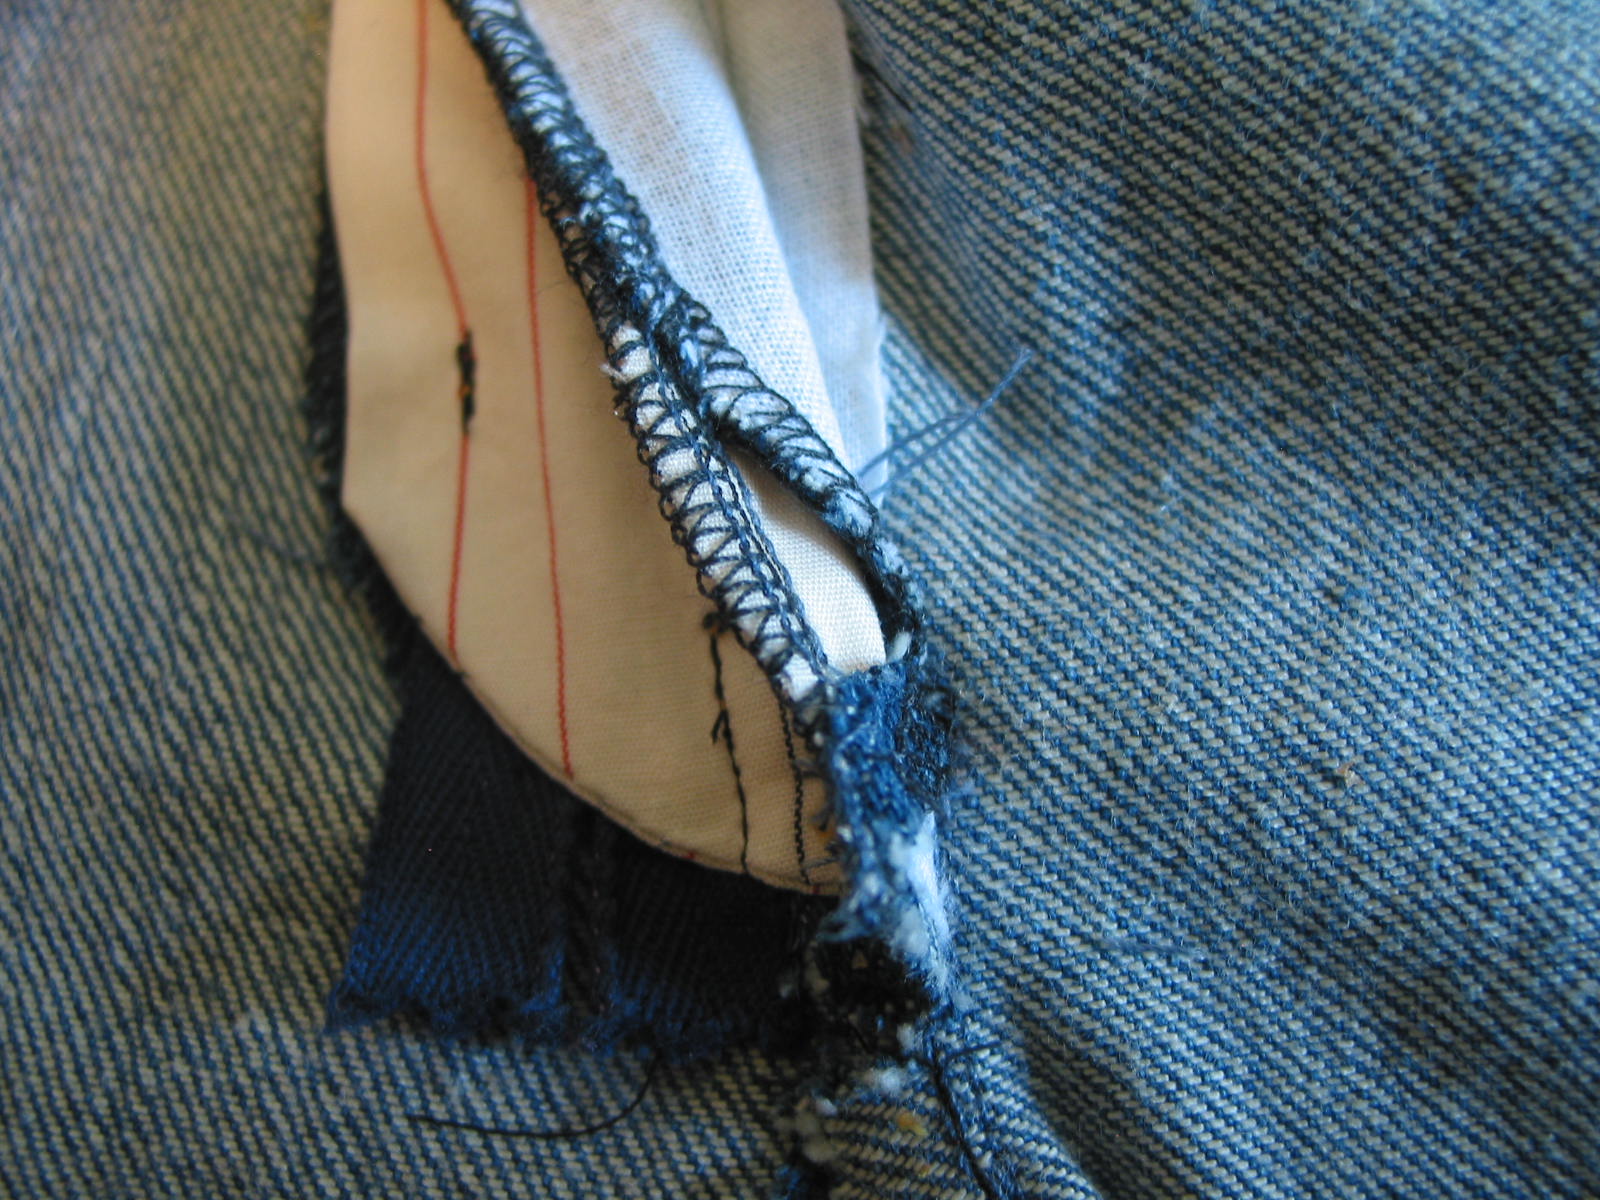 |
| The above shows what happens when your zipper guard isn't aligned with the edge of the zipper tape. I've stabilized it, & it's sturdy enough, but I learned my lesson! ( hope.....) |
Inside View:

Errrmmmm....what can I say about this next shot.....my next attempt will be prettier? The woggly line in the center of the guard is the zipper top stitching (stitched from the other side), caused by trying to get the foot stuffed into the very bottom of the fly. Gotta be a better way! The wiggly bit at the bottom right is due to my goof on the zipper guard placement:

Fold the crotch seam to one side, press, and topstitch....and.....

It's Done!!!! In spite of my zipper guard foible, I'm very happy with the results :^).
Back to the sewing room for the next step - with a little luck, I'll finish today!
6 comments:
Okay, I am packing up my sewing and driving down to your place for the weekend! :-) That was a wonderful tutorial.
You're welcome here anytime! ;^D
And thank you for the comment; without any comments, I wonder if putting all of this detail into a post is worth it to anyone but me lol!
This is a fun series! Particularly since we seem to be working through the same steps together! I should be inserting my zipper tomorrow (kids willing), so this was a nice timely reminder.
Nice! It's amazing how many different ways there are to insert a full fly front zip with guard.
Your woggly line and the rest of this tutorial was just right. Thank you. I really enjoy reading your posts. It's refreshing to read reviews with helpful information.
Thank You! Thank You! I followed this post for my first pair of jeans on the recommendation of a friend and it turned out fabulously. Two weeks later I am at the fly stage of my second pair, have been following Jalie's pattern instructions and ended up with a mess that took me much longer with my seam ripper than it did to sew it. Wondered why the instructions didn't feel familiar! Finally saw my note with reference to your post, printed it out and made another perfect fly! At the risk of repeating myself, THANK YOU!
Post a Comment