Here's Gabrielle - the machines belonged to a French woman, so they all got French names. (....yes, of course I name my machines. Don't you?). She's the 1926 66 as she looked when she came in the door. Well, actually, this is after I removed her from her treadle cabinet, which needs way more refurbishing than she did, but that's another story....

Here are the tools of the trade that I use:

Then, clockwise from left:
- OXO Brite (the way cheaper version of OxyClean) to clean up the metal bits.
- Maguiar's Scratch X - Fabulous first step to remove those fine scratches and built up grime.
- A good Carnauba Wax
- WD-40 - Good cleaner for the gears & moving metal bits inside the machine (more about this later)
- Sewing Machine Oil.
- Rags
- Sewing Machine Lube (Necessary for a machine w/ a motor - I didn't use any on this one)
- Screw Drivers.
- Other ingredients that didn't make it into the pic: Q-tips, small cleaning brush, tweezers, little bowls to hold all the little bits as you remove them, a camera or piece of paper to document any parts you dismantle until you know by heart which little spring & screw goes where, a good non-scratch Metal Polish, and a good manual for whatever machine you're working on.
Here's Gabrielle's gorgeous spoked hand wheel - there's something about these old spoked wheels - I just love them! :

OK, let's get started! Step one is to dust her off - you can even do a wipe down with some gentle dish soap if you have a really grimy baby on your hands. I then go straight to the metal bits, & start removing them. USE THE RIGHT SIZE SCREWDRIVER. Sorry for shouting, but this is how screws get stripped - make sure your screwdriver slot is a match for the slot in the screw - life will be so much easier if you just get into the habit of doing this right off the bat. Need I add the infamous phrase "Ask me how I know?" ;D Oh, and a note about vintage Singer screws: each one is unique & unusual, and you will NOT find a replacement in a hardware store. In fact, the only place to find a replacement for a missing screw is off another vintage Singer. Translation: do NOT lose your screws!
I usually start by simply removing the bobbin cover plates. What you find under here will tell you a lot about how well the machine was maintained. Remove any threads & fluff that you find with your tweezers & brush. I give this area a good blast with WD-40 & let it do its thing with all the gunk that is invariably built up here. Then I'll wipe it down, removing any excess WD-40.
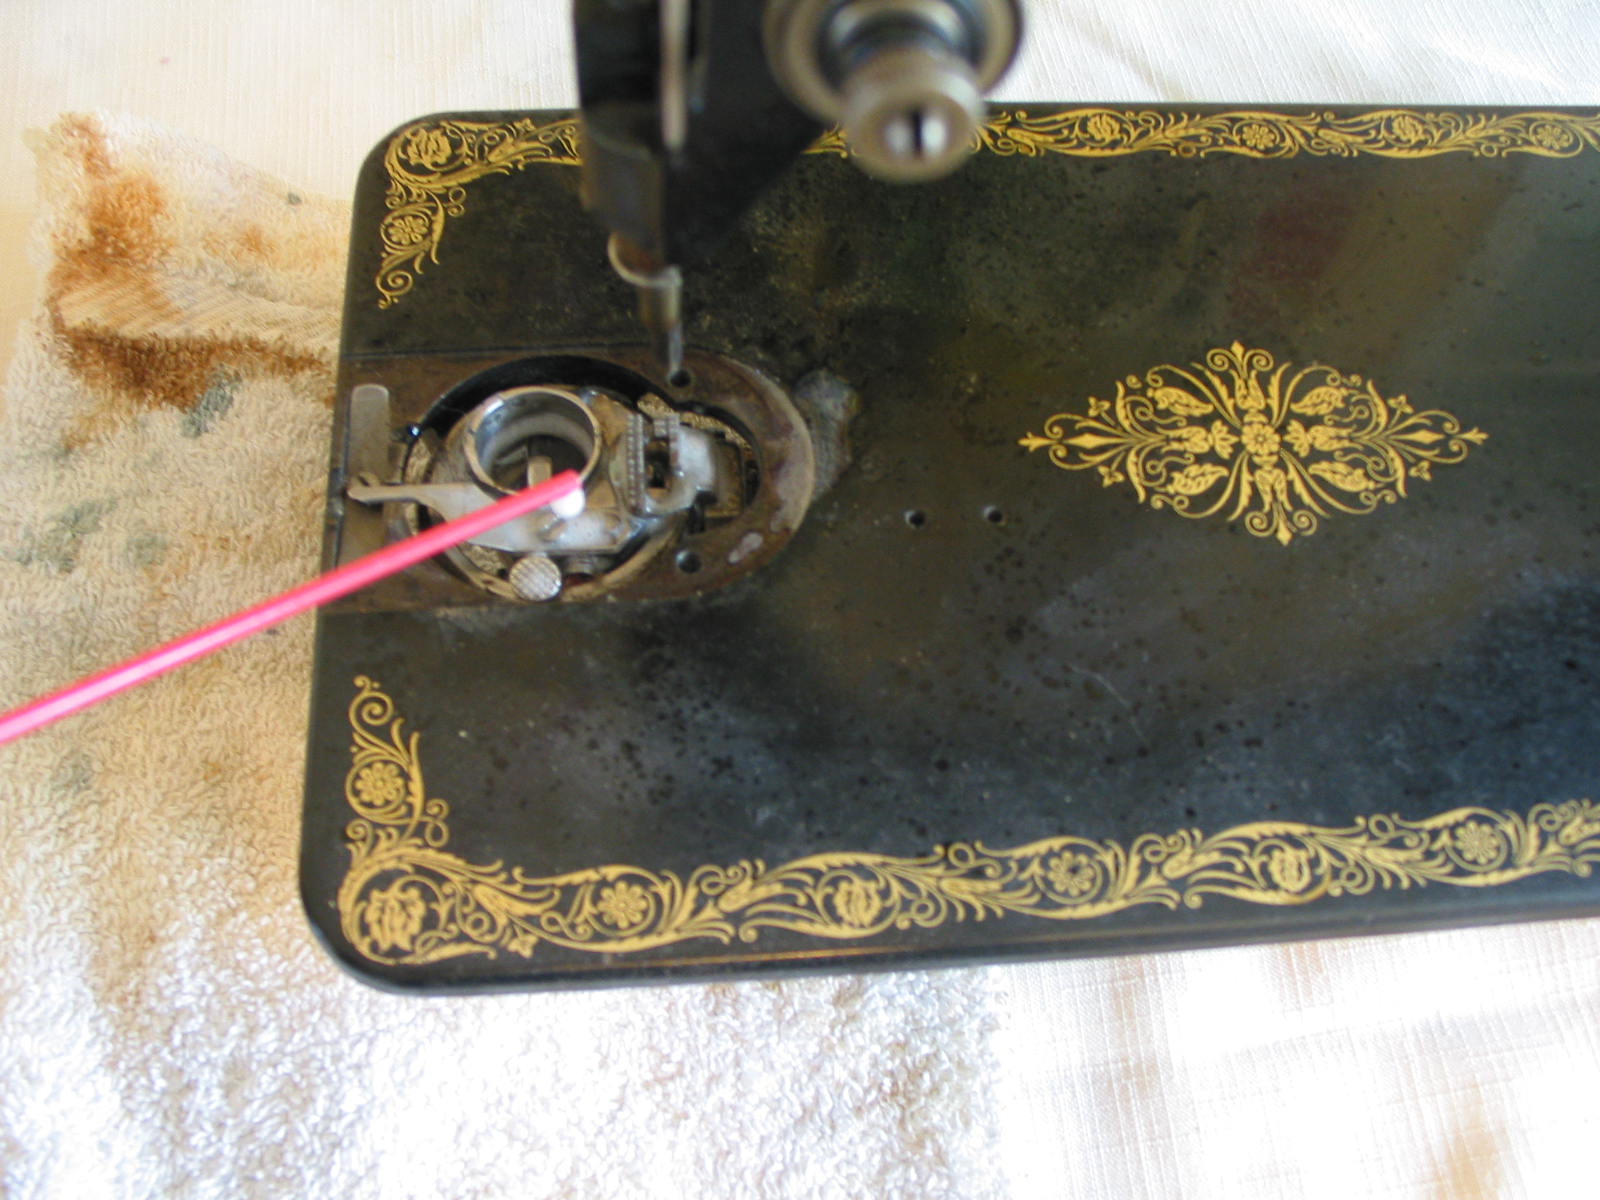
A note on WD-40: This is is NOT a substitute for SM oil, but it is perfectly safe to use on your metal parts. It's an excellent cleaner - just don't get it on any rubber bits, & wipe up any excess.
Once I have the bobbin area cleaned, I'll start removing all of the other metal parts.
Remove the hand wheel by unscrewing the chrome disc in the center.

There are a number of different bobbin winder types. If you have one that looks like this, PROCEED WITH CAUTION! There are a few types that have a spring which will fly across the room as soon as it's released. When it does this, go find it (You're doing this in daylight, right?) Then curse a bit when you realize you have no clue just how, exactly, it fit into the slots & holes that it just sprang out of. Don't worry, you'll figure it out. Eventually.

Can you see the little spring just behind that forked bit? The bit that looks like cute lil bunny ears (but is really devil's horns in disguise?) That's the spring I'm talking about. Just so's you know....

Here are the removed metal pieces, which are ready for their spa soak. Face plate, back plate, bobbin cover plates, tension parts (this is another section to document as you dismantle it, and/or have good manual pictures to follow), the hand wheel parts, and lots of little screws. I kept all of the bobbin winder parts completely separate in this case.

Plop some OXO Brite into a bowl that's large enough to hold all of your metal bits, (JUST the metal bits...don't add anything that has lacquer.....and, um.....don't ask me how I know about that one either.....), add boiling water, then let your metal bits soak for 10-20 minutes.

Remove the metal bits, rinse them THOROUGHLY, then dry them - THOROUGHLY. If you do this with SM feet (I do) or anything with tiny crevices that might hold moisture, I suggest using a hair dryer to make SURE they are COMPLETELY dry. You know how rust happens?
Now is a good time to go over the show pieces (face plate, etc.) with some metal polish. Although the OXO does a pretty thorough job, if your machine is really old, the metal polish will give it that extra oomph.
All shined up!

While everything is soaking, you can go after the gears & moving parts. I clean up any really filthy, gunky parts with WD40. (Don't forget to dry it well) Then start feeding. :) Follow your manual instructions regarding the oil spots, but mostly it's common sense. Just feed a drop of oil (just a drop - don't overdo it....) to any area that has moving parts that rub against each other.
Under the machine:


Inside the face plate:

Turn your wheel & feel & listen as everything starts to loosen up & glide - such a gratifying feeling!
Now it's time to start with the massage portion of the spa treatment :) Bring out the Scratch X, & put a small dollop on your massage cloth (this is where my old tshirts live out their life):

Now, gently (don't rub hard) massage the cream on to the lacquer. Do this on small portions at a time - maybe half the bed (or less, depending on how dirty your machine is. Don't let the cream dry, & don't do it for too long. This isn't scary stuff, but you can overdo it. (I took it to its limits on a machine I knew would need a total repaint job, just to see what the limits are -- you can rub TOO hard, and you can rub too long, but it really did take some elbow grease to overdo it) Just treat it like a gentle face cream that you don't want to use too much of, and you'll be fine. Don't rub too hard on the decals. Wipe it completely dry, give it a good rub to bring out the shine, and move on to the next section. One treatment is enough - you'll never need to do it again.

Next step is your wax job. I like doing 2 (or maybe 3) coats, with thin layers of wax. Apply wax with a soft cloth, let it dry, rub it down well. Ahhhhh........... now you can REALLY feel and see the difference!

Put all of her jewelry and make-up back on, and she's ready to roll!
For comparison:
For comparison:
 |
| Before |
 |
| After |
Now, I just need to get a new treadle belt, clean up the cabinet, move her into her working spot, and get treadling! I'm a bit torn about whether or not to wait until I have the time & energy to refinish her cabinet, or if I should just give it a basic cleaning so that I can get started sooner - I think I won't be able to wait....
I'll be doing a post about cleaning up Gabrielle's sister, Colette, the Featherweight, soon (I hope!). Feathers do have a few other steps - they're special, you know.......
Meanwhile, here's to providing good, loving homes to all our vintage orphans!
Meanwhile, here's to providing good, loving homes to all our vintage orphans!
26 comments:
Wow! She's beautiful! I was just at my Mom's house and her old Singer needs a bit of a face lift. I'm going to send her here.
Wonderful tutorial, thanks! I have a model 27 Singer, she works well, but I'll have to get me some of that wax and shine her up!
Great tip about the Oxi Brite! Lovely machine. The 66 is such an easy machine to use it's great you are giving it a good home. I too have a Singer 66 treadle.
How I wish I had the patience to do this! Great tutorial!
Very nice tutorial! She's beautiful.
Thanks everyone! Hearing & seeing restoration success stories just delights me, and if my experience helps someone bring out the best in their vintage lovely, that would delight me even more!
fab tutorial!! I'm on the look out for an old singer my great-grandmother had one but it ended up being thrown out :(
I name my sewing machines too hehe!!
fashbrickroad.blogspot.com/
Lovely, just lovely!
Yeah, the kerosene thing.. I tried it once, wasn't worth the time, effort, or smell.
You've done a spectacular job with her finish!
It always makes my heart glad to see one of these beauties restored to what they originally looked like, and it reminds me that we as a species are capable of producing lasting beauty.
"we as a species are capable of producing lasting beauty."
I am loving this quote!!!! So true, on so many of life's levels :) Thank you ac/dc!
Wonderful pictures and text, and sense of humor. Thank you!
Dear Jilly Be -
Appreciate seeing the love and care you put into your sweeties! I see in your pictures that you have a can of shoe polish. At what step do you use this? I am in envy of your shining little gems!
Cheers,
Wasquilter
Thank you Wasquilter :) Good eye! I realize the shoe polish is in a pic on the Featherweight post - that's where I use it; on the FW case. It's the perfect finishing touch to put the rich color back on to those old cases.
Wonderful information! Thank you so much!
Great job on this !
I have an old one that I will be cleaning someday - when I get a day off - LOL
I am bookmarking your page to help me when that happens.
Thanks :)
Hello
Thank you soo much for all this info, I know nothing but do want to learn.
I have just taken charge of, what I believe may be my first, 1905 Singer. It has some pitting to the body, is there anything I can do to make it better?
Thank you.
she's beautiful! nicely done.
Can't wait to try this on the 66 treadle I picked up last week. My first! I'm so excited.
Thank you.
Cool! My first Vingtage Singer Model 66 just arrived, don't even know if she's working but I'm soaking in your blog to get it all cleaned up first. Thanks for sharing!
Thanks.
I have a treadle and had the cabinet polished by a professional a few years ago but they left the machine untouched. I suspect after reading your post they were a little worried about flying springs! and perhaps removing the decals. By the way I still use mine to sew my quilts - I love her stitching. I have another really old singer that was my grandparents - they were tailors I will have a look to see if you have any suggestions on maintenance. That one is in need of some love :)
Thank you! I haven't yet begun to restore my old machines yet, as I just picked them up today. I purchased 3 antique sewing machines (1 singer) that are still in their cases and there is a lot of rust and grime on them. I only paid $25 for them. Your directions are wonderfully straight forward which I appreciate. I'm only 34 and have absolutely no experience with older machines so your experience is much appreciated.
I just acquired a pitiful looking Singer 27. The cabinet is surprisingly better-off than the machine. I hope to dive in on the cleaning and polishing this weekend.
Will the scratch x actually get the fine pin scratches out of the glaze finish. None of the scratches have gone thru to the paint but I am nervous of going too far.
If you want to join a great group of vintage sewing machine enthusiasts, I recommend http://www.victoriansweatshop.com/ where the people are really nice and very interesting.
I am so thankful for your resource and blog about each of these steps. I followed each just as you mentioned with each product you used. I am so happy and excited to have such amazing success using these methods. I feel like I have brand new machine!
Evan, 32 male Brooklyn
Singer 301 A
Very Helpful, thanks! I've done a bit of restoration, but I just inherited my Grandmother's 99k and it's in rougher shape than my previous dabbles into vintage machines. This was very helpful.
Post a Comment