This was a birthday present for a very special young woman in my life, who is now officially a 21-year adult! (Wasn't it only a couple of short years ago that she sat on my lap for hours on end as we watched the fish swim around in my aquarium???) But I digress.....
Laurel was visiting a couple of months ago when I told her I wanted to sew her something special, & we sat down with my patterns & the fabric stash. Together we chose this pattern & this vintage silk sari fabric, with a vision of a party dress for her:

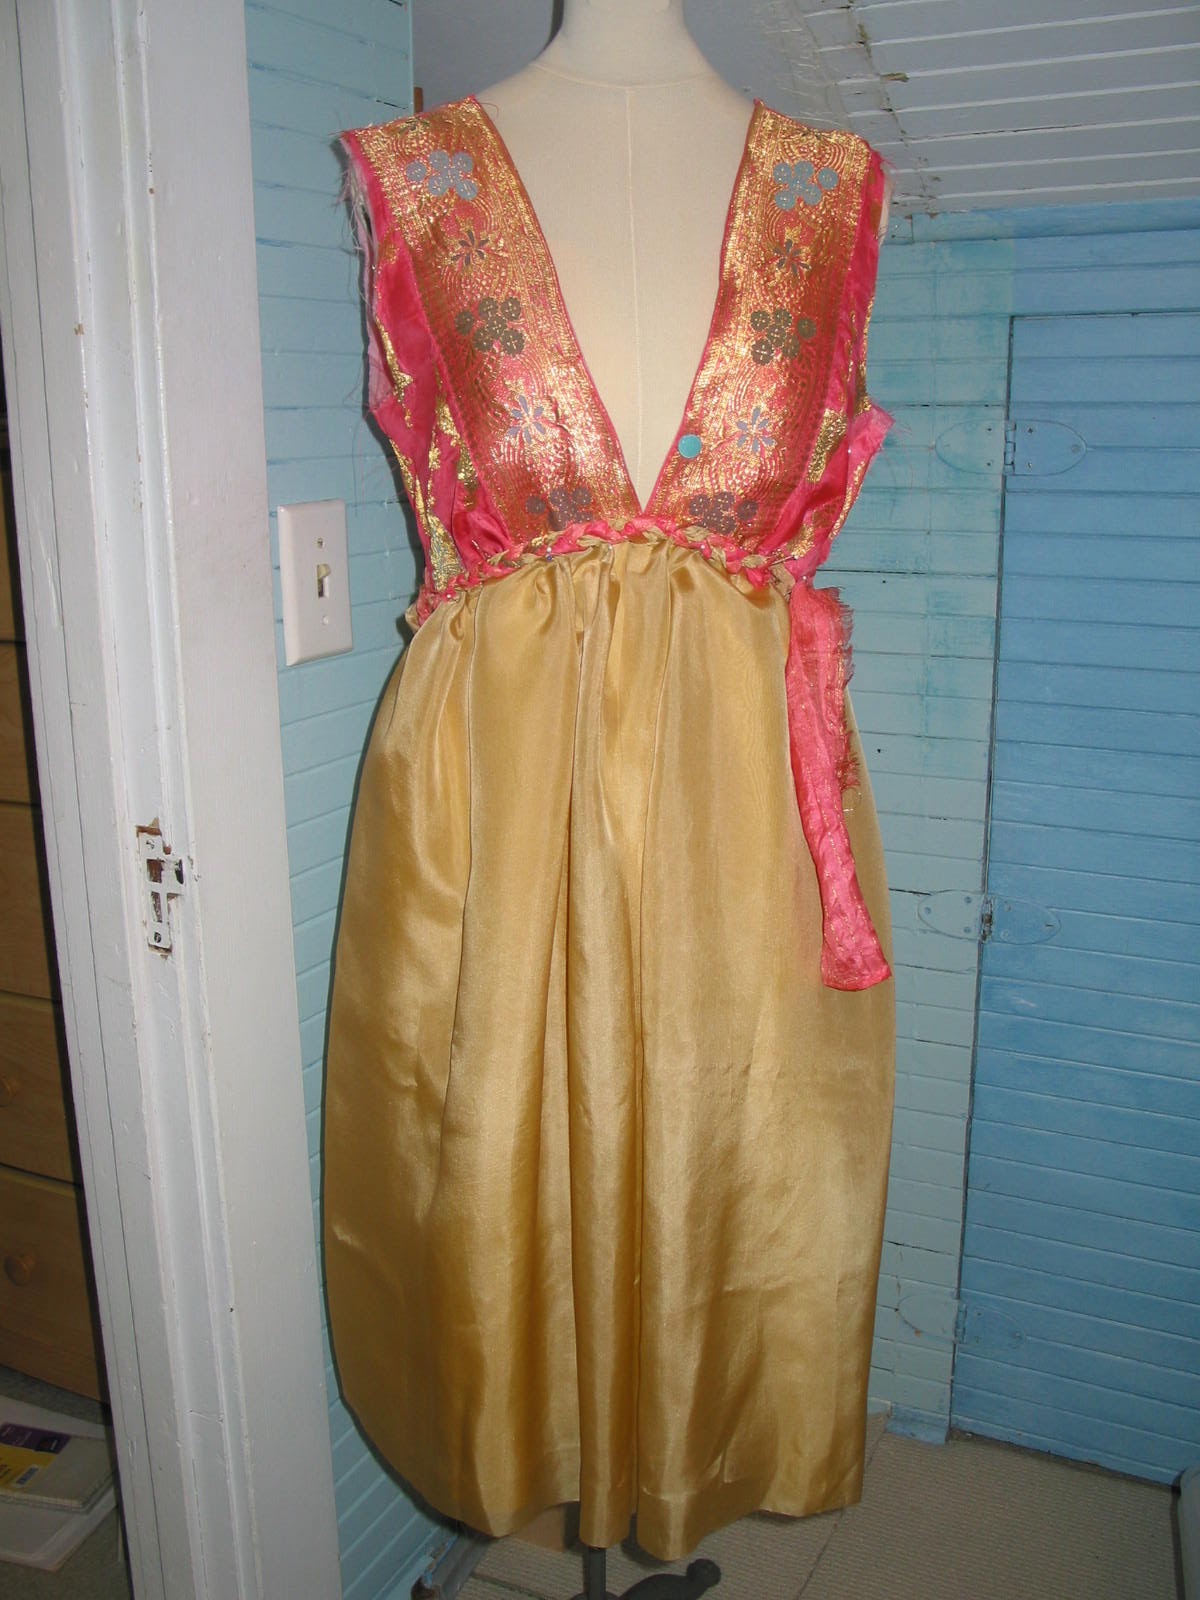
We discussed some options, I took measurements, & sent her on her merry way, not to be seen again until the day before delivery. Oh, how quickly I realized how I rely on being able to do regular fittings!!!! The other fact I realized early on was how VERY fragile, old, & flat out unusable so much of the sari silk was. The heavily embroidered edge was mostly OK, but the base fabric was so fine that it was actually near shredded in many areas. I was only going to be able to use it for the bodice. Stash came to the rescue with the perfect pink silk underlining, so the bodice was underway:

 |
| I wanted to match the trim on each side, but if you look closely, you'll see some ripped embroidery 2/3 of the way down the trim. I filed this under the "deal with it later" category..... |
Laurel loved the cornflower blue color, so I was hoping to find a color match for the skirt. No such luck :( I wanted silk, but NOTHING I found worked, in any fabric....so I looked through the golds/yellows, and settled on a pale yellow habotai, bought it, cut it...and realized that I didn't have enough. On top of which, I didn't really like the color anyway.
Back to the fabric store.
I returned with some silk habotai in a gold color, but it was really too TOO sheer Another lesson: It just wasn't registering that habotai comes in quite a range of weights. & still, not QUITE the right color. Bummer. I'm beginning to wonder if I'm receiving all these messages about a disaster in the making, but that didn't deter me from blundering on..... & then an Aha! moment (with some help from the discerning eyes of friends) and I realized that LAYERING the gold over the pale yellow produced the perfect color combination! *whew*
Remember that I didn't have enough of the pale yellow fabric? By using it as an underlayer, I was able to get enough fabric by using up all of the narrower strips of leftover fabric. I decided not to sew them together, but finish the edges, ending up with 6 strips of fabric (2 wide ones in the front & back, & 2 narrower ones on each side). There was some reasoning to this madness - since the overall circumference of this underlayer was going to be smaller than the outer layer, this would allow for more freedom of movement - Laurel is a dancer, after all - and a very good one, I might add! (can you tell how proud of her I am?)
Finishing all those edges allowed lots. and lots. of practice with my rolled hem foot. I daresay that by the end of this dress I was getting pretty darn good at sewing with that foot! At least on straight edges. Curves are another matter. But I digress again...
 |
| Rolled hem foot & Collette the Featherweight at work... |

I gathered the two skirt layers & attached them to the bodice (there was another period of angst here when I thought I had WAY too much bulk......did a bit of ripping & changed some of the gathers to soft pleats & started breathing easier again.... A side note: I had spray starched the skirt fabrics to make them easier to work with, and I just hoped that a wash would relax the skirt, because I was freaking out at the amount of poofiness it had at this point. Especially since I really didn't know how the fit was going to be, and with all of the gathers & the delicacy of the bodice fabric, there just wasn't going to be a whole lot of room for alteration by the time it was all put together.
Oh, & did I mention that the waist is an angled empire? High in the front, & lower in the back? I didn't exactly take THAT measurement.....
So now I have one bodice side seam sewn (French seams), the other is still open waiting for a zipper, the skirt is attached, and it's time to clean up that empire seam.
The dress sat on my dress form. For several weeks. Time is getting short. I need to dive in, & hope for the best. No turning back after this step.,.... (I said this was a saga. Are you still with me?)
 |
| Seam, trimmed & ready for some sort of finishing. |
 |
| I found some seam binding in stash (LOVE that stash!!!) & sewed it with some vague semblance of stitching in the ditch (I couldn't actually see the ditch through the binding so I was ditchin' blind.... plus time was getting short, & it's going to be covered on the outside, & I've long since accepted that this is not a couture piece. Heh.) |
 |
| Seam binding turned up & stitched along the other edge |
Now it's play time! I wanted to do some braiding along the empire seam, so I started playing with options. I also wanted some sort of closure at the neckline, since it was rather...ermmm....plunging. I lucked out & found the PERFECT shade of blue that was the background color in a silk I had (have I mentioned how much I LOVE having a stash???) :D I covered some buttons with the blue, and crossed one more "whatamIgonnadohere?" question off the list.
I can't put the zipper off any longer. It has to go in before the fitting. Say another little prayer that it will fit OK (while thinking about the possibility of darts, elastic....anything that I might be able to do to adjust the fit, if necessary ....just don't. be. too. SMALL!!!)
 |
| The edge waiting for the zipper. Have I mentioned how delicate & fray-prone the fabric is? |
I ended up using some of the blue-background fabric for the braid - the other colors in the pattern blended well with the dress, so it was perfect. I made some tubes, & enlisted my lovely little vintage reproduction sewing bird to help:

 |
| Remember the ripped threads I mentioned on the bodice trim? Time to deal with that now... |
 |
| Have I mentioned how nasty those metallic threads can be to control? It took several attempts to get one of those little blue flowers cut & turned without having sprays of gold metal sticking out everywhere.... |

 |
| Finally, I feel like I'm making progress! Braid is done (and I LOVE the braiding!), rip is covered.... it's going to be done in time! |
And it does!!!!! Well, mostly. A few tweaks around the armscye, and we figured out where to place the buttons & how to work the closure, measure for the hem, and I have a few hours to finish up! We're all thinking shades of Project Runway deadline along about now.....
 |
| I gathered the armscye at the front bodice a bit - unfortunately, one side ended up fitting perfectly, the other side still has a bit of a gap when she's wearing it. Maybe I'll be the only one who notices? Yeah right..... |
 |
| Zipper. Inserted. Armscye binding partially inserted. I'm not happy. :( |

There were a lot of lessons learned (hopefully) in the insertion of the zip & the armscye binding. Time was running out, so this side seam ended up in the "it is what it is" category. The turn of the cloth in a binding, when you're sewing over several layers (like, say, a French seam, or a zipper tape) takes up a LOT of fabric. A LOT. It finally hit home, and hopefully I'll account for that next time around. I ended up with a little point at the top of the zipper, & a gap in the binding that I'm still not sure how to deal with, but I just didn't have time to do research or practice, so there you have it. The gap in the braid is another aspect that could look a tad bit [koffkoff] more finished, but again, I'll blame lack of time (and late night sewing, at this point!) At least this is a side seam, not front & center!

The buttons are placed, the arm bindings are on, I made spaghetti straps for the button closures, and made another blue circle to balance out the one hiding the ripped threads. Almost done!

Oh yeah, I forgot to mention that the V in the back had some major issues with delicate, shredded fabric. That needed to be covered, but this one was a winning 'design factor', I think :)

Next morning, the delivery as the Birthday Girl stopped by on her way to the airport (and Spain. For a year. I'll miss her!!!)

 |
| She happened to be wearing a sports bra that was a PERFECT match for the blue! So the option for a more modest look is already there - how lucky was that? |


I think she likes it :) One more completed project. I'm happy.
14 comments:
Very, very pretty!!! I think she likes it.
Wow, when I saw this beautiful dress on facebook, I had no idea what was involved! A saga indeed! And a labor of love. It's beautiful and it looks beautiful on her. Wow, Spain. Lucky girl. :D
Yeah, you did it!! She looks as happy as you sound. Congratulations, its a lovely dress on a lovely girl.
Next time you do a side seam zipper sew the underarm seam down an inch then set the zipper in, this eliminates the issues you had, but excellent recovery:)
I have a similar piece of silk with the same sad results of it not aging well...glad you powered thru it.
An amazing story. You are such a good friend for her. And the result was definitely worth all the trouble. It is gorgeous and looks to be perfect for her. Bravo!
The dress was truly a labor of love, and it shows. Laurel is beautiful, and looks beautiful in the dress. What a perfect gift!
Beautiful! The girl, the dress & the story! And in Spain the girls dress for dancing, I'll bet this gets worn a lot. I can also see it as a tunic over leggings (maybe in the blue)for another look
Thank you for the lovely comments everyone!
shams it's just amazing what students have available to them now - she'll be studying (& getting credit) during her time in Spain, and she has an awesome internship that should allow her to do some extra traveling while there. I'm jealous!
Sue it's nice to hear that people dress for dancing in Spain - I thought that might be the case, & hope she does get a lot of use out of the dress :)
Note: Her Mom thought she shouldn't take the dress with, in case it got ruined. I stomped on that idea lol! I just told her that if something happens to it, save the pieces, & we'll make something else out of it :D
Wonderful story! so amazing to see the entire process behind the making of my beautiful dress!!! I absolutely love it and the passions, love and determination that went into making is evident in each stitch. I feel so incredibly lucky to have such a talented aunty <3
I cant wait to wear the dress through the twisting streets of granada! It's definitely appropriate since everyone here is very stylish.
My first hand made dress and I couldnt be happier.
Love love love you Jillian!
xoxo
Laurel! So glad you were able to pop in! And I can't wait to read more of your adventures and your poetry. Big hugs....Big Smiles....Big Love xoxo
Lynne I forgot to say "Thank You!" for the zipper tip! I'll be practicing...... :)
You always amaze me with how you can take some challenges and conquer them, then wind up with a work of art. Pat yourself on the back.
Laurel looks so happy wearing her dress.
Very beautiful! I too love the braid.
That is the most beautiful dress, and she is a perfect match for it. Great tip about the spray starch. The colors really are perfect.
So pretty! Love the twirl.
Post a Comment