Blend before left 2 and right 1 before using the tags A and B. Maintain with a surpiqure fantasy....
What? You still don't understand, you say? Me neither. On to #3:
Superimpose two front left and right front one by using the reperes A and B. Maintain with fancy stitching...
Now we're talking! Sort of. I think.... Or maybe I could just toss the directions in the trash and wing it...
Thankfully, this delightful Au Bonheurs des Petites Mains (The happiness of small hand) pattern is easy enough to figure out without going through too many "Huh?" moments in translation. My high school French ("la plume de ma tante...") was rather lacking in helpfulness here. It helped a LOT that Dorothy and shams had gone before me, with their beautiful versions and supremely helpful reviews. Dorothy K's review and Shams' review. Seriously, I could NOT have done this without their help! Actually, I really, seriously could not have done this without them, since Au Bonheur (hereinafter known as ABdPM) has gone out of business, and the only way I could get my mitts on this pattern was because Shams generously traced off my size for me (hugz!). And she got her copy from Dorothy. So if you like this pattern, grab any copy you find! Actually, that holds true for ANY ABdPM pattern.
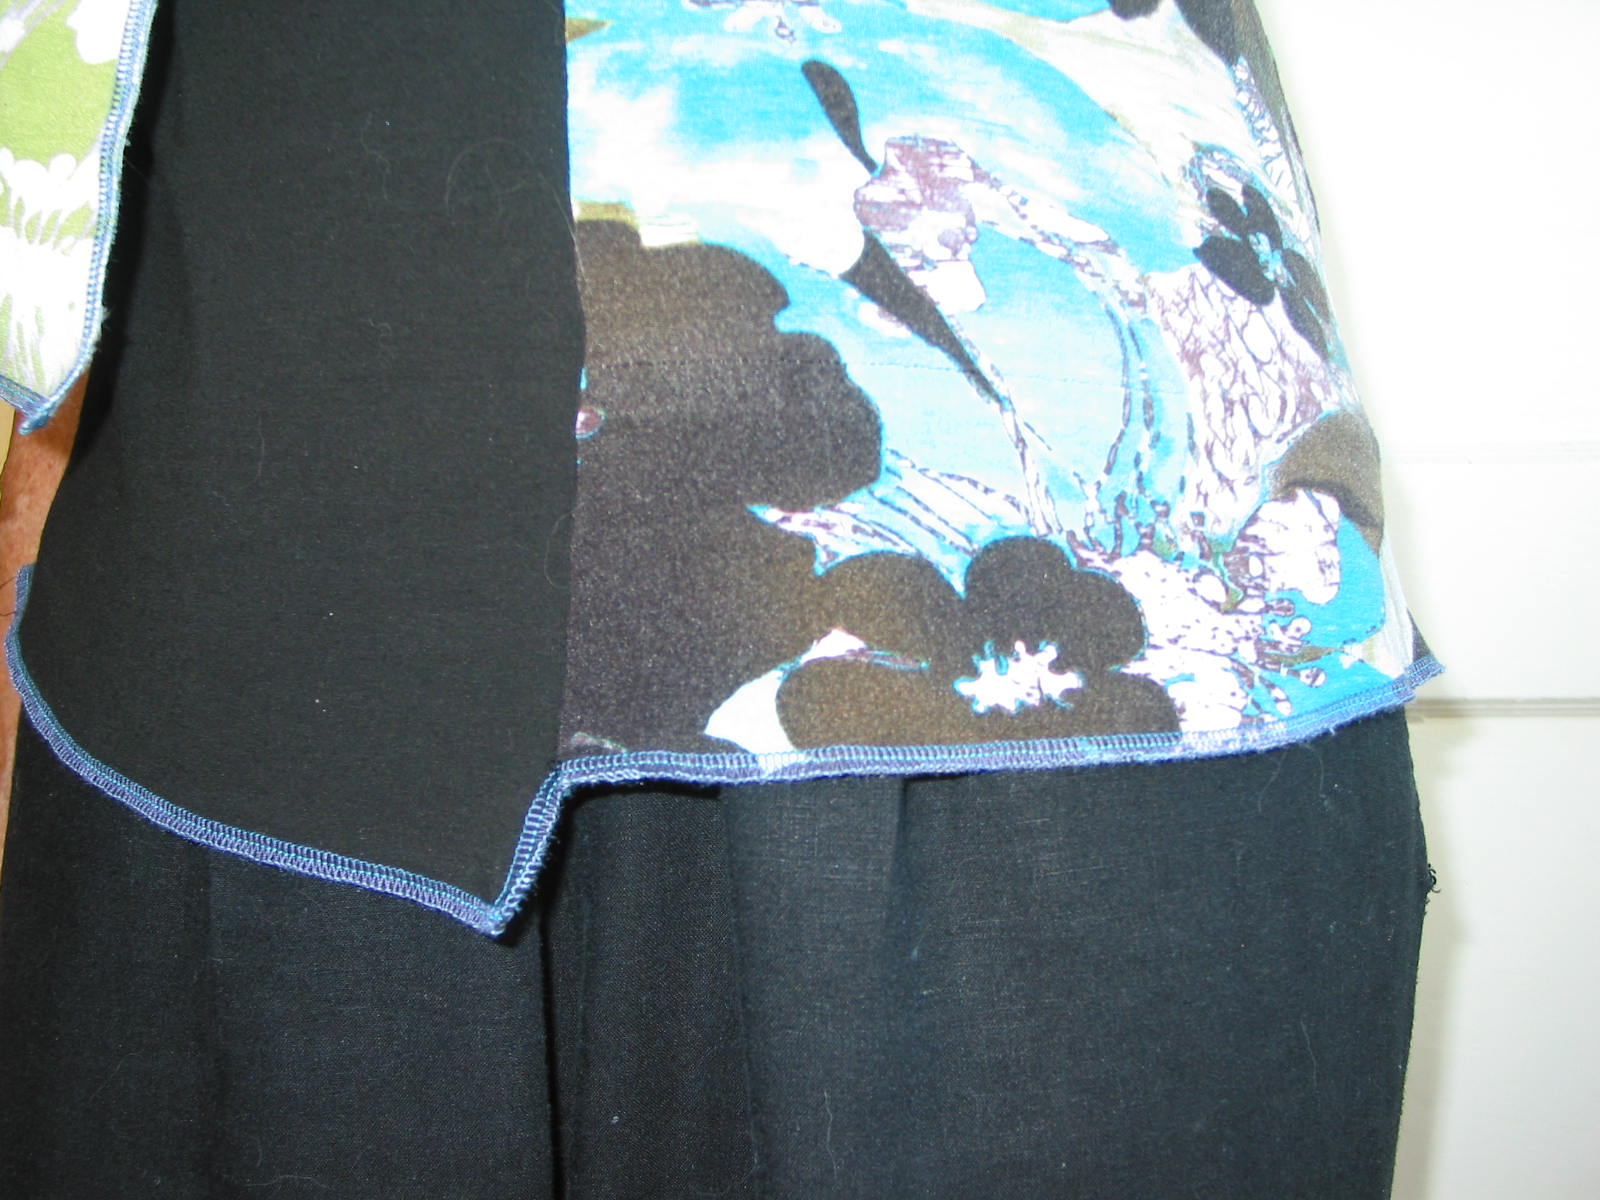
The bad stuff: I spent a ridiculous amount of time tweaking the fit, piecing together my too small bits of material scraps, futzing with serged edges (I really need some practice at that...), and wandering off in my own direction & trying to figure out where I was going. The good news is that I was able to muddle through it all, and I ended up with a top I really love!


It's wonderful to have pictures of this top as it really looks made up, because the illustration with the pattern looks a bit different than the finished top, and the line drawing doesn't look even remotely like the finished product!
 |
| This version shows the front seam angled; it is not - it's straight up and down. The overlay is a little angled - on my version the overlay looks more angled than it really is on the pattern; mine ended up like this because I needed to take it in more at the side seams in order to get it to lie flat. (It's called artistic license. Or correcting a stupid mistake. Take your pick) ;-) |
One of the really wonderful aspects of this pattern is that the pieces are all quite small, and you can raid your scrap bin and use up all of the pieces you love too much to recycle elsewhere. I actually pieced together both the front and back pieces of the print in order to get large enough pieces of fabric.
 |
| See the seam? :) |
 |
| It did the trick :) |
Of course, I didn't make it any easier on myself when I decided, on a whim, to add this little square on the top tag after it had already been sewn & serged. Y'all know, I'm sure, how tricky it can be to merge a new serged edge over a previously serged edge.
 |
| It's a little messy, but not so bad that I can't live with it. |

This means I ended up with a harlequin look on the sleeves - I like it :)
Bottom line? I really love this pattern, and can see using parts of it over and over in other patterns. It was definitely worth all of the tweaking :)


Do you have any ABdPM patterns hiding in your stash, yet to be sewn? Time to drag them out, sew them up and share!
29 comments:
Jillian, this version is fabulous!! It is *perfect* on you!
Wow! Great result! I love your fabric choices. I would be at a loss to read the French, or to have the sewing nous to figure it out either, so bravo to you!
WOW, I love it! And you know what? I have this pattern AND I have the same fabric scraps (the print). I've been trying to work out for months what fabric to use with this pattern. I can see a copy-cat tee on the horizon. Just as well we live at opposite ends of the earth. :)
Thank you shams :)
Thanks Karin - trust me, I threw the French out the window and relied on those brave souls who weathered the storm ahead of me :)
What are the odds? Go for it...one major difference, I know, is that yours will be far better sewn than mine :D
What a cute outfit! I have none of the AB patterns. Makes me wish I had stashed some when I had the chance.
Wonderful, JillyB. No wonder you love it. I do too.
So cute, and I love the color on you! Isn't it so rewarding to end up with a top you feel good in after all that futzing?
You asked about the serging. Sometimes what I do if the end will show, is leave a long tail, tying a knot close to where the serging ends, then using a sewing needle, thread the needle with the tail and weave it through the stitching on the underside. My Babylock manual recommends fray-check also.
This is more of an artistic choice, but have you considered a rolled edge done on the serger? I like the finish that stitch makes on knits. I use it for lightweight wovens also, especially if I am making a scarf.
Hope that helps, and glad this one is a big win!
The top looks great and so perfect for summer. I really like the accent fabric.
As a Canadian I am ashamed to say je ne parle pas francais. That pretty much is the extent of my French, except of course for the French on all our products here. Not that does me any good. Unless you need to know that lipides means fat or glucides means carbohydrate. Anyway
What a cute top and so you. I am glad you pushed through all the issues, cause it really turned out well. It is the kind of pattern that could look so different with prints in different places or no prints at all, you could make a few of them without looking like you can only afford one pattern 8-D.
I wonder why the pic on the pattern is so different from the pattern? How odd, or how French.
I love it! How fun and unique it is- just the reason to sew your own clothes- you'd never find something so perfect and you in a store! (please insert a french exclamation of endorsement here for me,since I never took French!)
After all the fiddling it turned out fabulous! (Unlike my current frustrating patternmaking efforts.) So sad that such an innovative pattern business closed. Perhaps it was the fact that you couldn't really see what you were getting into? They might have been better off to market in more than one language too, though I could probably have muddled through the French. (Easier than Russian!) Missed my chance unfortunately.
Beautiful, very artistic...don't know how you did it! Can't figure out how you serged it like that...my serger doesn't turn corners. I do know how to pull the tails through with a crochet hook, but you wouldn't want to do that on the outside. Everything you make is perfectl sewn! Jilly...you talked about maybe sewing for others...getting paid for it. Have you thought of giving sewing lessons???? Seriously!!!!!
What a cool top. The fabric combinations are gorgeous. I hope you make some more from this pattern to get good value from all your tweaking work.
Beyond pretty, just so interesting and unique. Love it.
Another winner! Great job!
Many of my patterns seem to say "oversew the environment" and they are in English!
Ooops, had to go back and add EPs to my sentences!
It"s a really cool shirt. What a great job you did!
I'm good with rolled edges on the serger; I just wanted the serging to be a design feature on this top. I remembered that I did do one other fancy-thread serging on edges, but that was just a square with 4 corners. This one was loaded with corners, & I was far too lazy to hand stitch each batch of serger threads down. I do need to come to terms with that though :-|
Judi I didn't turn any corners - just serged off the end, & started over on the next edge. & then folded under 1 cm or so & Fray Checked the heck out of it. It just feels so not right to do that, but maybe it just is what it is.....
You always make me giggle!!! ;-D
Thank you so much for the compliments everyone! I'm all grins here :)
And I wore that outfit this afternoon - still loving it :)
All your planning and tweaking and futzing paid off - your top and the fabric combination is so artistic and unique. Reminds me of one of those $600+ Babette SF tops.
Shams is such a wonderful gal, right? Your top looks fantastic, cute fabric and love that asymmetry :)
Cool fabric, cool top, cool woman - need I say more?
A Babette comparison? I'm totally flattered!!! :D
Shams definitely rocks!
::::beam:::: :D
Late to the party - great top! I thread my serger ends through a yarn needle, stick them up the seam about an inch or so, and cut off. Seems to work.
Post a Comment