It's about exploring and sharing my creative adventures (mostly sewing these days) ~
~those activities that sometimes obsess, usually inspire, occasionally frustrate
~and always provide a delightful maze to wander through.

Wednesday, October 30, 2013

Patterns and Pillowcases

I don't usually post about new pattern releases, since so many others beat me to it anyway, and do such a good job of it, but Vogue stepped up to the plate this time, so I renewed my Club BMV Membership and sent off my order.

Normally I order 3 patterns at a time - shipping for my address is $4.00 for 3, 8.00 for 6, and my frugal self thinks that $4.00 shipping is plenty.   Plus, I really REALLY don't need more than 3 patterns at a time, especially given the number of unsewn patterns I already have.  Stash-aholics (patterns & fabric alike) please feel free to join me in one.  big.  collective.  ::::sigh::::

In fact, I had every intention of only ordering 3 this time.   Here are my top 3:

Marcy Titlton's V8954.  I REALLY like love love LOVE the way Marcy has styled the collar on her Blog Post - cannot WAIT to try this pattern out!  Note:  she also includes a number of very helpful-looking hints in her post.  I love a practical vest with some visual twists - this one looks like it has endless potential!


Donna Karan's V1378.  These pants could be JUST the slim-pant pattern I've been waiting for!  I hope that the reality of how these might fit and flatter lives up to my vision of shaping perfection!  I've never joined the legions of those who love crossover tops and dresses, so I'l probably pass on the top.


V8962 (Very Easy)  I like the shaping and seaming on this one.   It might give just the sort of shaping at the hipline (for those of us.....you know....) that might actually make for a more flattering fit.   Especially if you have hips that ....you know... AND you're short!

After giving considerable thought to that extra shipping charge (not to mention the pattern charge - hey, what can I say?  If you've followed my blog for any length of time you know that I do have frugal leanings!), I ended up adding my next 3 choices:

The other Marcy Tilton, V8966:  The hats are very cute, and I like the scarf, although it doesn't look like something that needs an actual pattern to figure out.  Still, the hats ARE cute....

Koos van den Akker V1377.   The likelihood of me making THIS coat is slim, very slim, but I'm a sucker for his artistic details, and I can often find some gem that's worth using in his patterns!

And Hey!  Vogue!!!   How about actually using some of Mr. van den Akker's construction methods in your patterns, instead of making up your own (less effective, more work-intensive) techniques?!?!   Vogue???


And finally, Sandra Betzina's V1375 made the cut.  I hope it's not just the black & grey stripes that are calling out to me....   I do think a long sleeveless vest could be highly wearable, although this one will need some tweaking to work on my body.

I'm excited!   Now....finding the time and energy to sew them all up.... :D

And then there are pillowcases!
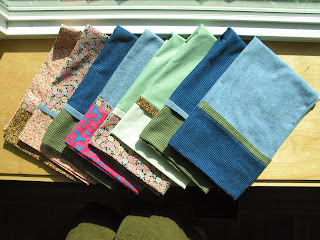
At the end of our fabric sharing soiree last weekend there were a few unclaimed cuts of cotton that gave me a little "aha!" moment.  I've been wanting to join in Rhonda's Pillowcase making project (900!!!  pillowcases benefitting Mary Bridge Hospital) for some time, and this was just the impetus I needed.   Although I only used 2 fabrics that came from the delightfully generous Lori's stash, most of what I used was actually given to me, so it was exceptionally wonderful to be able to pass on the gifts in the form of something useful :)

I know that Rhonda is nearly at her goal of 900 cases (if she isn't there already!), but quilt shops all over have some form of donation connections for pillowcases, blankets, etc.,  so I'm betting many of us don't actually need to send items like this off in the mail.   Animal shelters as well - bedding for the critters is often needed.     I'm lucky to have a local fabric store (Stonemountain & Daughter) that has a box by the front door to drop off all of your scraps - shoppers can go through the box & pick out what they want, & the rest of it is used for various projects.    I encourage you to find a use for your leftovers, and please think twice before throwing any of it in the trash!


I admit that I'm not much of a fan of dressing up animals,
but this pic I could NOT resist!!!!! :D
Have a Safe and Happy Halloween, all!

Sunday, October 27, 2013

BABES in Fabricland....

Yesterday I had the pleasure of gathering with yet another group of fabulous local (and semi-local) sewing friends - my delightful group of BABES (Bay Area Bash Expressly for Sewists).   Not that we ever need an excuse to get together, but we had a good one - long-term BABES member   Lori, who blogs at  Monkeyroom was back home for a short visit after 2 years in Germany, so we made sure to gather the troops while she was here.

Little did we know just how much we were going to benefit from this visit!  But more about that later...

A number of us attended the always-loaded-with-inspiration Artistry in Fashion this year and have been working on patterns we got from Sandra Ericson of Center for Pattern Design.  We showed our finished (and semi-finished) pieces, and, in true opinionated sewing form, both dissed and praised her unique style and pattern-making techniques (I'm definitely on the prone-to-praise end of the scale, but then the 3 patterns I bought from her were carefully curated by me, and involved as much trying on of finished pieces as I could manage!)  I shared my experiences with the CB Bolero and the Spiral Blouse (coming soon to a blog near you....).  The lovely Lisa was wearing her muslin of the Spiral Blouse, Vicki showed a highly wearable "muslin" of the Spiral Coat, Heather modeled several versions of the Pyramid Dress (which has the most amazingly unique pattern pieces I've ever seen....you really need to SEE it to understand it....no wait, even seeing it won't help you understand it.....).   There were a few wadders involved - I admit that FITTING Ericson's unusual designs is not the easiest sewing task to master; luckily the bias drape of many of her garments solves a myriad of potential fitting issues.

Here are shots of a couple of the CPD pieces:

Vicki's gorgeous closure on the Spiral Coat:

Lisa having fun with bright shiny objects -
I think her Spiral Blouse muslin is awesome!


Georgene, of the inactive but still amazing blog Sewing Divas, showed her progress on the 3-years-in-the-making-during-her-spare-time Chanel Jacket (and it's looking good!!)


Wendy, Rose, and Vicki had all attended the Education of the Textile Arts Sew Expo the week before (if I can learn to say & remember that mouthful, it sounds like an event worth attending next year!)  Wendy showed samples of some techniques she learned from Jan Bones at one of the many workshops given during the Expo.  Wendy, btw, is  very knowledgabe with her sewing techniques already, but she felt that she really got a lot out of the workshops she attended.   It sounds like a great venue!

Lori brought her beautiful dress - shown here on her blog - and the yummiest scarf that she wove herself - I have weaving envy!  There were a few other show and tells, and oh, did I mention a tableful of deliciously delectable goodies that we munched on?   Like....all day long?   I should remember to take pictures of the food tables at some of these events.   Sewists can Cook!

There were a few other show & tells...

and then....

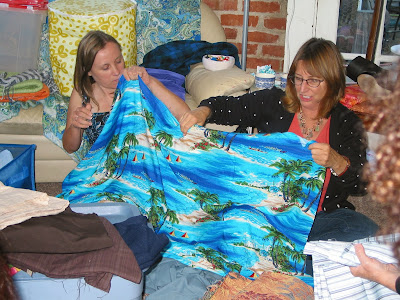
the Fabric Feeding Frenzy Fun began....

In the interest of preserving the privacy of a certain Fabricaholic, I won't name any names.  But in order to clear out some of her (apparently rather large) stash before returning to Germany, one of us brought Four.  Large.  Tubs.  of fabulous fabric in the desparate hope that some of it would find new homes.

This is what happened:
Jennifer and Wendy begin with Polite Fabric Inspection: 

Fabric Tugging Ensues
Mine.  No, Mine.  No no....MINE!:

The pile grows larger while people politely pet and eye
certain cuts, waiting to see if someone else wants it more....

The Unnamed Fabricaholic gazes at the stash, 
wondering if she's really ready to let that piece go, 
while Irene reaches for a goodie that has caught her eye.


Rose of Needles, Pins, Thorns inspects all sides of a beautiful bit of brightness,
while Georgene and Lisa fondle other goodies:

Rose's smile indicates that this one is definitely coming home with her!

Hands reach for that last bit of 
unclaimed fabric.... 

with absolutely unprecedented results, the above tiny piles were ALL that was left of the stash-sharing-giveaway!   This speaks to the quality of Lori's stash (oops, did I just give her name away???  My bad....)  The bad news...sort of...is that we always send off our unclaimed fabric & notions to a school in the Philippines, and we usually have a LOT to give.    This time...yeah...not so much.

I was really happy to help out the cause of clearing Lori's stash.   And help I did.   A lot.   I thought I was doing so well with the large bag of fabric I brought to give away...but I went home with nearly twice as much:

Not only that, but check out those labeled cards with fabric content and amount!    I feel so righteous when I actually manage to do that when I bring new fabric home....maybe this will help inspire me to be a little more conscious?

Yeah....doubt it.

Thanks Lori, for your gracious generosity, and thanks to all my bodacious BABES buddies for a fantastic day!   :)


Wednesday, October 23, 2013

My Asian/Cowboy/Betzina Duster

I admit it.   When I first saw Sandra Betzina's duster pattern (Vogue 1356) I didn't get it.   At all.  It was immediately filed in my "No Way!" category, until shams performed her magic on it.  The minute I saw her Geisha Faces Duster I converted from "No Way" to "I Want!" faster than I've ever done before.   I snapped up the pattern at the earliest sale, and immediately shifted my plans for a trio of linens I had from Plan A to Plan Duster.

I started working on it pre-robbery, and had a number of construction notes and pics in the computer, but they were in the (rather large...sigh....) pile of photos that never got backed up (yes, I DO have an external hard drive now, and yes, I AM using it regularly!)

So we'll just have to jump straight to the finished product, while I dig through my brain & try to remember the adjustments I made.
I used some of my Marcy Tilton Asian-esque silk screens on the coat, but it holds this Western sort of essence to it in my mind - you know, the craggy-faced cowboy with the rough & ready duster flowing in the dust as he strides towards his horse....   Anyway, I keep finding that I want to wear my jeans & cowboy boots (shit-kickers, where I hail from....see how this thing is affecting me???) and to date that's all I've worn it with.   I know it has a lot more versatility than that, though!

I must have nearly a dozen Betzina patterns, but for some reason, I've simply never managed to move one to the top of the queue until now, so this is my first.   I must say, I'm impressed!   She includes a lot of construction details and helpful hints (even though I don't agree with some of them), and her fit is designed for a more mature, "real" woman's body - narrower shoulders and wider hips, for instance.  And she's managed to get Vogue to do it her way!   She writes her own instructions (apparently most Vogue patterns do NOT use the designer's construction methods, which is likely where a lot of confusion comes from by the time it reaches the home sewer).   Go Sandra!

Pattern Notes:

  • The coat is described as "very loose fitting", usually a warning that screams "BAGGY" when it comes to Vogue, but with the cut and the darts (fish eye darts in the back, plus bust darts), it actually skims the body.
  • The sleeves are two-piece and cut on the bias - a very nice shape!   But I found them to be VERY skinny, surprising coming from Ms. B., since she's usually very conscious of designing sleeves for *ahem* 'mature' arms.   The sleeves are also VERY long!   I shortened mine by several inches (maybe 3"?)
  • The pockets are simple, but unique.  There are two pockets on each side of the front, one nested inside the other.   I didn't use her pockets - no particular reason other than the fact that I tested my silk screen on a bit of fabric and decided to use that as a pocket, so I stitched it down to another piece of contrast fabric and called it done.   :-)   (NOTE:   I usually silk screen my finished piece, but I test the screening on the fabric I'm using, then lay the test pieces on my finished piece before I start the actual painting on the garment.   Yes, it has caused issues, but I've always managed to turn them into a "Design Element" lol!)
POCKET:
  • The facing pieces are very large - this I liked, especially since the coat is unlined.  The facing construction instructions, however, were odd to me.   They call for sewing the interfacing to the RIGHT side of the facing pieces, then turning them right side out before sewing it all in to the coat (thus ending up with finished edges where the facing & interfacing are sewn together.   It sounded awkward to me.   I think I ended up doing essentially the same thing shams did, and fused interfacing to the wrong side of the facings, sewed them in to the coat, then finished the edges (fray-prone linen!) with folded over bias strips. 
Finished Back with bias strip edged facings, and Hong Kong finishes on the sleeve seams.
(And paint bits showing  post silk-screening)
  • Another oddity is that the placket used for the front closure is supposed to be cut on the bias.  This makes NO sense to me, unless you're using a fabric that has stripes, or some other design element that you want to showcase with a bias cut, but even then wouldn't you have to interface the stuffing out of the thing to get it to hold its shape?   I just cut mine on grain.
Alterations:

  • I cut a Size B at the very top, and narrowed the shoulders by about 1"
  • I expanded to a size C at the waist
  • I changed the armscye shaping to suit me a bit better
  • Did a full upper arm adjustment (easy to do with the two-piece sleeve)
  • Shortened the sleeves by about 3", still leaving a very deep hem so that I have the option of turning the cuffs up
  • Shortened the coat by 4"
  • Lengthened the side slits by....something or other.
Oh, I also added a contrast yoke at the back.   This was one of those "Design Elements" required by having a shortage of fabric.  For some reason this ended up causing me a fair amount of angst, I think because the bottom of the yoke ended up right where the lower armscye meets the side seam - not good planning!   But, as I say, I was working with what I had, fabric-wise, so it goes into the category of "it is what it is".

I ended up using plastic "invisible" snaps for closure at the placket - I intended to use snaps and buttons, but I didn't plan out my silk screen placement all that well, so I eliminated the visible button or snap option and used the invisibles.   I'm not sure if I used too much thread, adding some depth to the snaps, but I find that they need a bit more pressure to snap shut than I thought they might - anyone else have experience with these?


Back View, Inside Out:

Front View, Inside Out:


The Wearing of the Duster:

The tough Cowgirl look (yeah, right....)


The Bottom Line:

Thumbs up on this pattern!   It's perfect for a three-season Bay Area evening in linen, and would work well in a cotton, a light wool, or any number of blends.   I can definitely see making this one again, although it may be awhile, since I think I'm on another coat & jacket binge, and have a slew of patterns I want to check out :)


Tuesday, October 22, 2013

Balenciaga + Ericson = CB Bolero = Win!

As I mentioned in my previous posts, I recently bought 3 patterns from Sandra Ericson of Center for Pattern Design, all inspired by Balenciaga.  I've already made up 2 of them, and the 3rd is ready for a muslin- that should give you an idea of how impressed I am with the designs!   But it's more than being impressed.  There is intrigue, puzzlement, challenge, awe, and in the end, a highly wearable piece that is as much a simple work of art as it is practical clothing!

Imho, Balenciaga +  Ericson = wearable haute couture for the masses!  OK, so not exactly haute couture technique, but you get my drift, right?  I certainly give thanks to Ms. E. for bringing his patterns to the public!

I'll start with a shot of the finished CB Bolero:


I'm delighted with the results!   The fabric is an unusual double knit of unknown content - it has almost a neoprene-like feel to it, but not really....   It was such an odd fabric that I only bought a shade over 2 yards (and that presented a major challenge fitting this pattern on it!)  Now that I've worked with it, I wish I'd bought more!  It's stable and easy to work with, and the cut edges are so clean I left the hemlines raw (something you RARELY see on anything I make!)  To see just how versatile the fabric can be (is it fair of me to rave about a fabric that is probably impossible to find anymore?  sorry......[evilgrin]), check out shams' dress (which, btw, is an entry in the Fabric Mart Challenge - visit the link  & please vote for your favorite in the contest)!  (Do I need to say out loud that my personal favorite dress was made by shams?)  ;-)  The fabric, btw,  came from Fabrix in SF, my absolute favorite discount fabric destination! 

I really thought I would end up with a casual piece, but once it started coming together I was concerned that it was going to be too dressy for me to get much wear from!  (clearly I don't get out on the town in a fancy way much).   In the end though, this is a piece that can be dressed up or down, and I WILL get a lot of wear from it!

The sizing is 8-18.  This pattern appears to run on the small side - I made a 14, but I added length by cutting it at the size 18 at the bottom.   And then I left the hem as a raw edge, so this added a total of 2-4" in the length.   I did end up cutting in the shoulders by almost 2" at the widest cut (to accommodate my narrow, sloping shoulders), but I think I would need to do this even on a smaller size.  The bias drape of the piece allows for a lot of flexibility in fit, but if you want to make it from a piece of precious fabric, I would definitely recommend a muslin.

On to the construction.   I don't know how helpful my pics & explanations will be, because the way it's put together is far more puzzling than meets the eye when looking at the pattern pieces.  Genius is what it is, imho!   To look at the finished piece, one can easily think it's just a circle with sleeves cut in.   Hah.   I HIGHLY recommend a dress form helper, and if you're like me, you'll be draping the pieces on over & over again trying to figure out exactly how it all goes together & which edges to put together for the seams, and which sides are RS and which are WS....  Of course, there are NO hints or instructions on seam finishes, or any sort of finishing tips at all.   This is stated up front - these are "'educational patterns'; that is, they are unusual and most often have some feature that is a learning experience which is the whole point in publishing them."

Note:  I don't mean to discourage anyone - sewing it all together is really quite easy, once you understand how it works.   It just took my brain on a bit of a voyage before it all made sense to me.

Construction Steps (the dry & potentially boring stuff - but if you end up making this, hopefully the following will be helpful!):
After sewing in the darts, you sew the shoulder seams (instructions say to sew the side seams as well, but since I was figuring it all out step by step [I did not muslin it],  I used slightly different steps.)
Note the folded over section at the neckline -
when I was cutting this out I thought that the CF was at the lower edge of that fold.
Wrong.
CF is on a folded part somewhere in the center of that piece!
Not obvious until you start putting it together....
Enclosed seams are advised for all of the seams.  In the following pic, note that the shoulder seam is sewn by matching the armscyes of the front and back pieces.  The extra fabric on the front will be folder over to meet the "collar", or "cape".
  

Once you attach the 'collar' (i.e., the back portion of the cape), at the shoulder seams, there can be a lot of bulk at the shoulder seams if you use a fairly thick fabric (which this is).   With a fair amount of seam trimming, it worked well though.   A thicker fabric like this will really stand away from the body; a thinner fabric would give more drape, but one of the beauties of this pattern is that many fabrics will work well with it, even sheers!


I won't even pretend that I can explain what's happening in the following pic.   I just added it to show you how confused someone (i.e., ME, can get while trying to figure out how the puzzle pieces go together!   Really, it isn't all THAT confusing, it's just that, for me, draping it on another body was a necessity to have it all fall into place!

The following pic shows the collar/cape and the front piece sewn together, after the collar has been attached at the shoulder seams, and the front piece has been folded back to meet the edge of the collar piece.

Are ya with me?

A try-on at this stage showed that the shoulder slope was  too broad on me, in no small part due to the stable thickness of the fabric.   I adjusted the seamline, bringing the back (collar) piece forward a bit, and trimmed it by over 1-1/2" at the deepest cut.

Finished Jacket, with sleeves set in, inside out:
Reminder to Self (for the Umpteenth Time):
Certain actions are OK to perform post-midnight.
Serging Set-in Sleeves is not one of those actions.


After the bolero was completed, I realized that it was just a tad bit fiddly/slippery, and decided that buttons were called for.   I added a button on each side of CF, and in order to keep some flexibility, decided to just use various ties as closures, so that I could mix & match whatever I want to wear it with.  A little touch of brilliance, if I do say so myself! ;-)


A few shots of the finished piece in action.  

A slightly more casual look:


Note:  The green tie here is just a cut-at-the-last-minute strip of fabric 
matching the top (a Burda T-neck).  
 I promise I won't go out in public without a more finished tie!


And a dressier option:
(Worn with The Dress, and The Trippens)  


The tie closure here is a a scrunchie hair tie
(something that has never worked on my barely-there hair, even when it was long!)

The feedback I've had from everyone who's seen this cape/bolero/jacket/thingy in person has all been very positive.   Even from people who don't normally like capes!  I expect to see a lot more versions, since I personally know half a dozen or so people who ordered it after Sandra's presentation at Artistry in Fashion.

Besides a variety of fabrics, Sandra suggests options like cutting the back a lot longer for a more elegant look.   You could also easily eliminate the sleeves for a sleeveless version.   I can see a slew of very different-looking pieces from this pattern!  I have a lot of other projects on my plate, so I don't think I'll be making another one immediately, but I'll definitely keep this in stash for another fabric to jump up & down wanting to become another CB Bolero.

How about you?  Have I convinced you that it's worth a go?