I'd been hemming & hawing for awhile about getting a new ironing board cover - spring for one of the pricey Miracle covers? See if I can find something locally? Make one myself? & if so, how & out of what?
Finally I'd had enough.... I went through my stash, "scorch tested" a few pieces of cotton I found, looked at how the old cover was constructed, & just did it......
 |
Need I say more about why I needed a new one?
I gathered together the ingredients: Fabric, the string from the old cover, some bias tape from stash, and an old cord pull closure thingy (what ARE those things called???) I also used an old wool blanket and a layer of batting. |
 |
| Drawstring closure thingy made of plastic w/ spring inside |
I removed the old cover, cut two from the new fabric, with some extra around the edges for seam allowance. The old cover held the string in place with some strong stitching, using some sort of an industrial style of overlock. I figured bias tape would do the job just as well.
 |
| Lovely bright orange bias tape - almost certainly came from a bag of freebies from a yard sale, or maybe one of the goodies stuffed inside the drawer of one of my vintage SM cabinets :) Not a color I think I'll ever need for a fashion garment (I have nothing against bright orange...on other people....). I simply stitched the tape to the edge of the fabric, turned & pressed it, then stitched up the other side of the tape, creating a tube for the string. |
 |
| The string, ready to thread through the seam enclosure..... |
 |
| All stringed up, looped through the cord closure, tied off at the end, & ready to install! |
 |
| The blue is an old wool blanket that I sent through the washer & drier (on Hot!) a couple of times (the blanket was another yard sale freebie find....hey, I'm frugal when I can be!). I used two layers of wool, one layer of batting (from my stash), & the cover on top |
 |
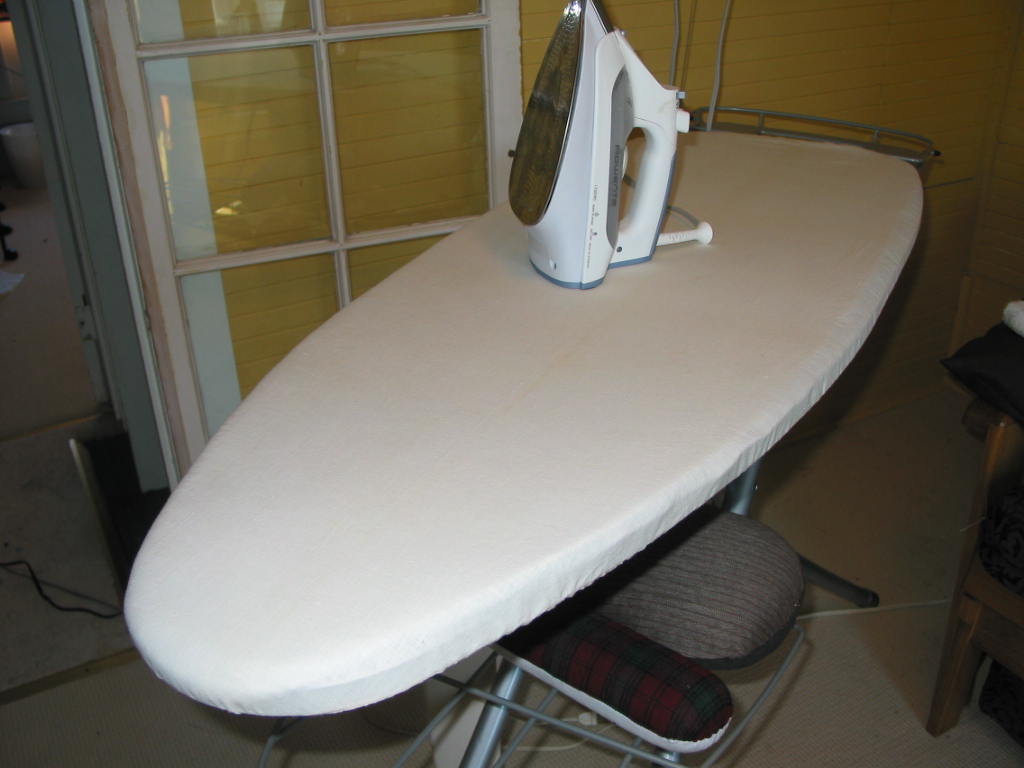
| All pulled up tight & ready to scorch! I mean.. well.... *sigh* I'll TRY not to scorch it.... not for awhile anyway....... |
P.S. To my credit, I've not scorched any fabric yet....only my board cover. Just in case you were concerned.....


5 comments:
Questions:
1) How does one scorch an ironing board cover?
2) Where did you get that board? I've never seen one that had such a nice rounded end as most are more pointed and create some minor problems when pressing flat pieces.
Ummmm....are you saying you've never scorched a board cover? Is my klutziness really THAT unusual? :o
I actually got this ironing board at Bed Bath & Beyond (with a 20% off coupon, of course) I'd had a rickety old normal size ironing board for years, and this one felt like wide prairie expanse in comparison!
Too bad the cover only lasted a year.....
I do like your ironing board. I made myself a cover a year or so ago, using denim and several layers of wool. I LOVE it!
Denim! I love it....I'll remember that for next time.....
Really like the ironing board cover and I may have to come back to your tutorial when my covers need to be replaced.
The plastic cord thingie is called a cord stopper or cord lock.
Post a Comment