So I finally decided it was time to set aside the arty wearables I've been playing with for the past year, & start sewing some more practical items for myself. Especially since all of my years-old winter long-sleeved layers & fuzzies are either getting worn out or uglied out.
I decided that the Burda turtleneck (9-2010-121) that has been so popular over at Pattern Review would be a good first step into the maze of eye-bleeding pattern lines that the Burda mags are so famous for. Especially since it's only 3 pattern pieces, & with the construction simplicity & all the hints that have been documented at PR, I figured I could ignore the also (in)famous pattern instructions that Burda continually gets knocked for. I made a mental note to add the seam allowances (yet another Burda idiosyncrasy...gotta add the SA's yourself...) So why is Burda so popular? Great styles, definitely, and great fit, apparently.... so it's time for me to have a go at it!
First off....all. those. lines. Here's a sample:
 |
| I outlined my pattern pieces with yellow hi-liter - just roughly tracing over the largest size, so that I could more easily locate my pieces on the tracing paper. |
In spite of how often I reminded myself to add the seam allowances, when I cut out my first 2 pattern pieces....yep..... I forgot. At least I did it on the pattern pieces, not fabric!! *whew*.
 |
| Here's a traced pattern piece. After my initial goof, I retraced my pieces & then placed carbon paper beneath my tracing, & followed my seam line with a double tracing wheel, adding my seam allowances. |
One thing that seemed obvious to me was that the sleeve cap on this top looked very high - & the instructions called for easing the sleeve & installing it after sewing up the side seams & sleeve seams. Really? On a knit top? So right off the bat I lowered the sleeve cap - I've done this by guess & by golly before; this time I decided to learn it the "right" way, so I cut & slashed & re-drew the sleeve cap:
 |
| Altered cap sleeve. To remove the excess ease from the sleeve cap - cut across the sleeve below the cap, & slash from the sleeve cap top (here I made a cut in front and in back) all the way to the cross cut. Overlap the slashed pieces, lay the cap back on the sleeve piece, matching the edges, & tape back together. (Hope that made sense....if anyone would like more clarification, I'll detail it with better pics) |
Here's the t-neck portion. Step one (thanks to PR hints) was to add some ribbon at the center back of the t-neck, so that it will be nice & easy from here on out to tell the difference between front & back. It's good advice!

 |
| Turn the top inside out, then Fold the neck (both front & back pieces together, touching each other) over, so that the side seam curves match. Pin the edges together, & baste. NOTE: This was what I did on this, my first version of the top. I simplified it even further on later versions, and did NOT sew the entire length of the t-neck...I only sewed the bottom inch or so. More about this later....) |
 |
| Side seams basted together, ready to sew. |
 |
| After sewing the side seams together, separate the front & back neck pieces & flip them into place. You're done! |
I still had more ease to deal with than I wanted on the sleeve cap, so I made some more adjustments on my pattern pieces for the future tops (I have made FOUR of these.....so far!)
With sleeves installed, it's time to serge up the sides & the arms, decide on a hem finish (I used a double needle on this one) & it's done! No neck binding to deal with....it's almost criminal how easy this top is!
'nother note: Thanks to Lynn Rowe's wonderful knit sewalong at PR, there are a few steps to take that I now consider essential in a well-made knit top. Be anal about cutting on the grain. I even thread trace down the grain on a solid color, just to be SURE my pattern is laid on straight. I'm not putting all this time into making a top, just to have it twist on me after a wash or two! I also baste all of my hems in place before sewing. Each time I thought I could bypass this step, I was sorry. And my thread tracing & hand basting is getting faster all the time :)
Here's Top #1, finished! This is a bamboo knit from Fabric Mart.
 |
| Note the 3/4 length sleeves. This is because I flat out didn't have enough fabric (those pattern sleeves are loooooong!) This one I hemmed with a double needle. |
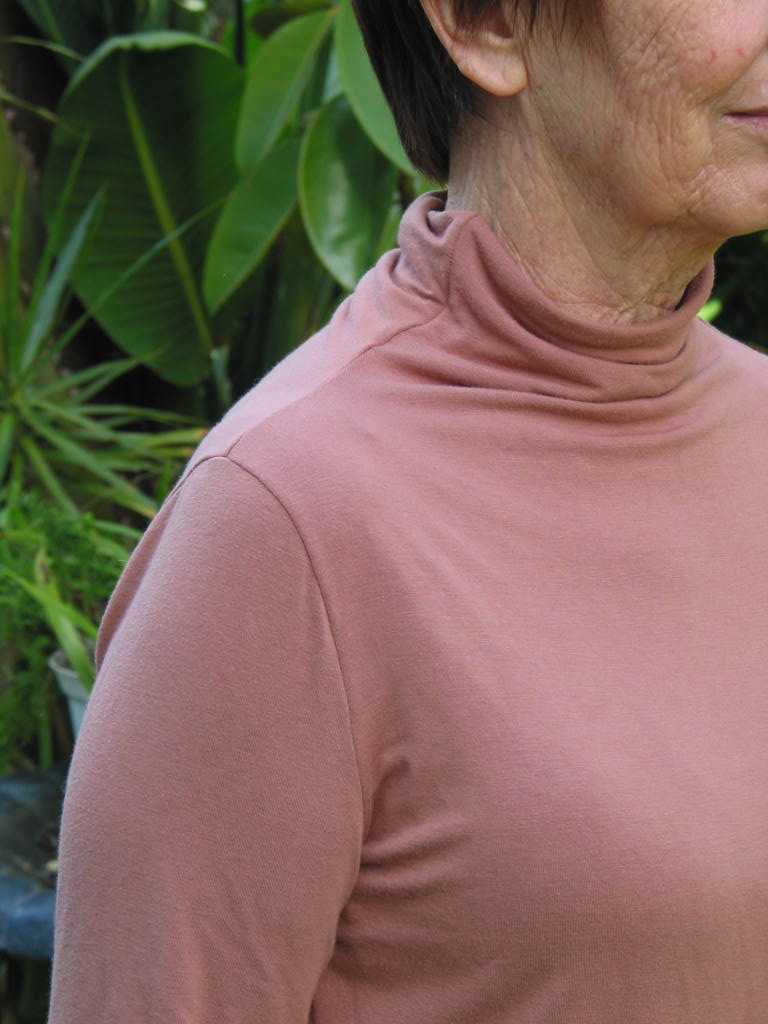 |
| See the little pointy big at the side seam top of the neck? This top has a tendency to move into that position after being worn for awhile. |
 |
| This was top #4 - I only attached the neck seams at the lower edge, for about an inch. The top (folded over) section holds the fold nicely, but the seam line is softer, & doesn't settle in to that point. |
I'm on a roll now! I did make a few more alterations, & at this point I am super happy with everything about this pattern! The t-neck is very comfy (not too confining) & I even love the suuuuuuper looooong sleeves! I nearly always cut my sleeves to 3/4 length, or roll them up, but it has more to do with those sleeve ends just getting in the way.
Alterations made:
1. Cut out excess sleeve cap ease.
2. Adjust armscye
3. Narrow the shoulders a bit.
4. Sew a slightly narrower seam in the neck, to be SURE it's not too tight....same with the upper sleeves.
5. Widen the waist & hips (usual for me on pretty much any snuggish pattern)
6. I cut the lower end of the sleeves quite a bit narrower - more than an inch off, I think, so that the gathered portion of the long sleeves stays in place & doesn't slip over my hands.
The other versions:
 |
| A fun & funky rayon knit from Emma One Sock. Full length sleeves on this one. |
 |
| The back - I LOVE this fabric! |
 |
| Another fun EOS knit. I cut these sleeves as long as I could with the fabric I had (I think this was a roll end) You really need the FULL 2 yards the pattern calls for if you want the full length sleeves! I hemmed this one with a triple stitch - it's a tad bit less 'formal' looking than the double needle, and a WHOLE last faster! (don't need to change the needle, re-thread - twice - and you can hem it from the inside.) |
 |
| Bamboo knit from Fabric Mart. I LOVE their bamboo, & plan on getting more colors as soon as it goes on sale again! |
7 comments:
These look great. A lot of good tips here. Are you going to make the next few the same or make some style changes? Either way they will look good.
Great tops! I especially love that green one with the black lines.
Thank you! Gl I need to put this pattern away & move on for awhile, but the basics of this pattern are so good that I probably won't make any major changes when I pick it up again.
Shams that's my favorite too! & the fabric feels super yummy too - it's one of EOS's really nice rayon knits :)
Jilly, I love the knits you picked and congratulations for the trifecta: first Burda, TNT AND successfull sleevecap manipulation, wow!
I haven't made this top (yet) but you make me want to so much, LOL!
Jilly, I'm about to make this up and it's my first Burda, too! Thank you so much for all the details, here and on PR. I won't have to reinvent the wheel!
I'm sold on this turtleneck now or maybe I'm sold on your beautiful fabric. I hope that you catch the bamboo on sale during one of their daily sales. That bamboo looks buttery soft. Their modal fabric is nice and soft too. Thanks
I just found your blog (I am new to reading blogs) - and this shirt caught my eye. But as I clicked around cyberspace, I have not found any way to order it. I realize it is a Burda Style Magazine pattern. Do you know if there is any way I may be able to get my hands on this pattern?
Thanks
Post a Comment