There are a whole slew of tutorials on making these pattern weights, so yet another might be overkill, but hey, it's my blog and I can do it anyway. ;-D
I've used large washers as pattern weights for some time, but I always thought it would be nice to pretty them up a bit. At the greedy gift grab I just attended I saw THE nicest covered washer pattern weights ever, made by the talented (but blogless) Sue Krimmer, whose gorgeous wool felt hats I mentioned in this post on last Fall's Artistry In Fashion. I was, at last, inspired to make my own. Covered washers, not hats. (not that I wouldn't LOVE to make hats.....someday.....) I should mention that Sue's weights were one of the most stolen and sought after items in the gift grab - they were pretty awesome!
I took a trip to the hardware store to expand my supply of washers. Actually, 2 hardware stores. If you have a local store that's well supplied with goodies, just go there first and ignore the big box chains. Just trust me on this one; I will say no more...
What you'll need:
- Metal Washers. Minimum size of 2", up to 4", or even larger if you want. (I used 2" - 3.5")
- Glue to double your washers together (or even triple the smaller ones, if you want) I used some E6000, and some Devco 60 second Epoxy, just because that's what I had on hand.*
- Ribbon, fabric strips, bias tape, grosgrain, yarn.....whatever you feel like playing with to cover the washers.
- Glue to finish off the ribbon. I understand that Liquid Stitch is a good choice; I used Formula 77, just because that's what I had on hand, and it worked well. (I sprayed it on some paper, then dabbed it onto the ribbon with a toothpick)
- Scissors and Pins**
*Note on the Glue: You want something to hold the washers together firmly, and several people recommended the E6000, but it may be overkill. This stuff is potent!!! (use it outside). You also need to let it set for awhile. I had some Devco 60 Second Epoxy as well, so I used that up. It sets up quickly, but I think it's pretty wasteful and expensive. Once the washers are wrapped up, I think they'll hold together pretty well, so I really think that any glue that's meant for metal will be fine.
**Note on Pins: You may want to use old ones - since you'll be pushing them through glue, you may not want to use them on fabric again.
 |
| Washers (already doubled and glued) and some vintage trim from stash. |
Once you've wrapped all the way around, cut the ribbon. I cut mine so that they would end on the inside of the circle, and be less visible. I folded over the end of the ribbon, glued the fold, then glued the end on the inside circle. I then pinned the end in place until the glue dried.
 |
| Ribbon Pinned in place. |
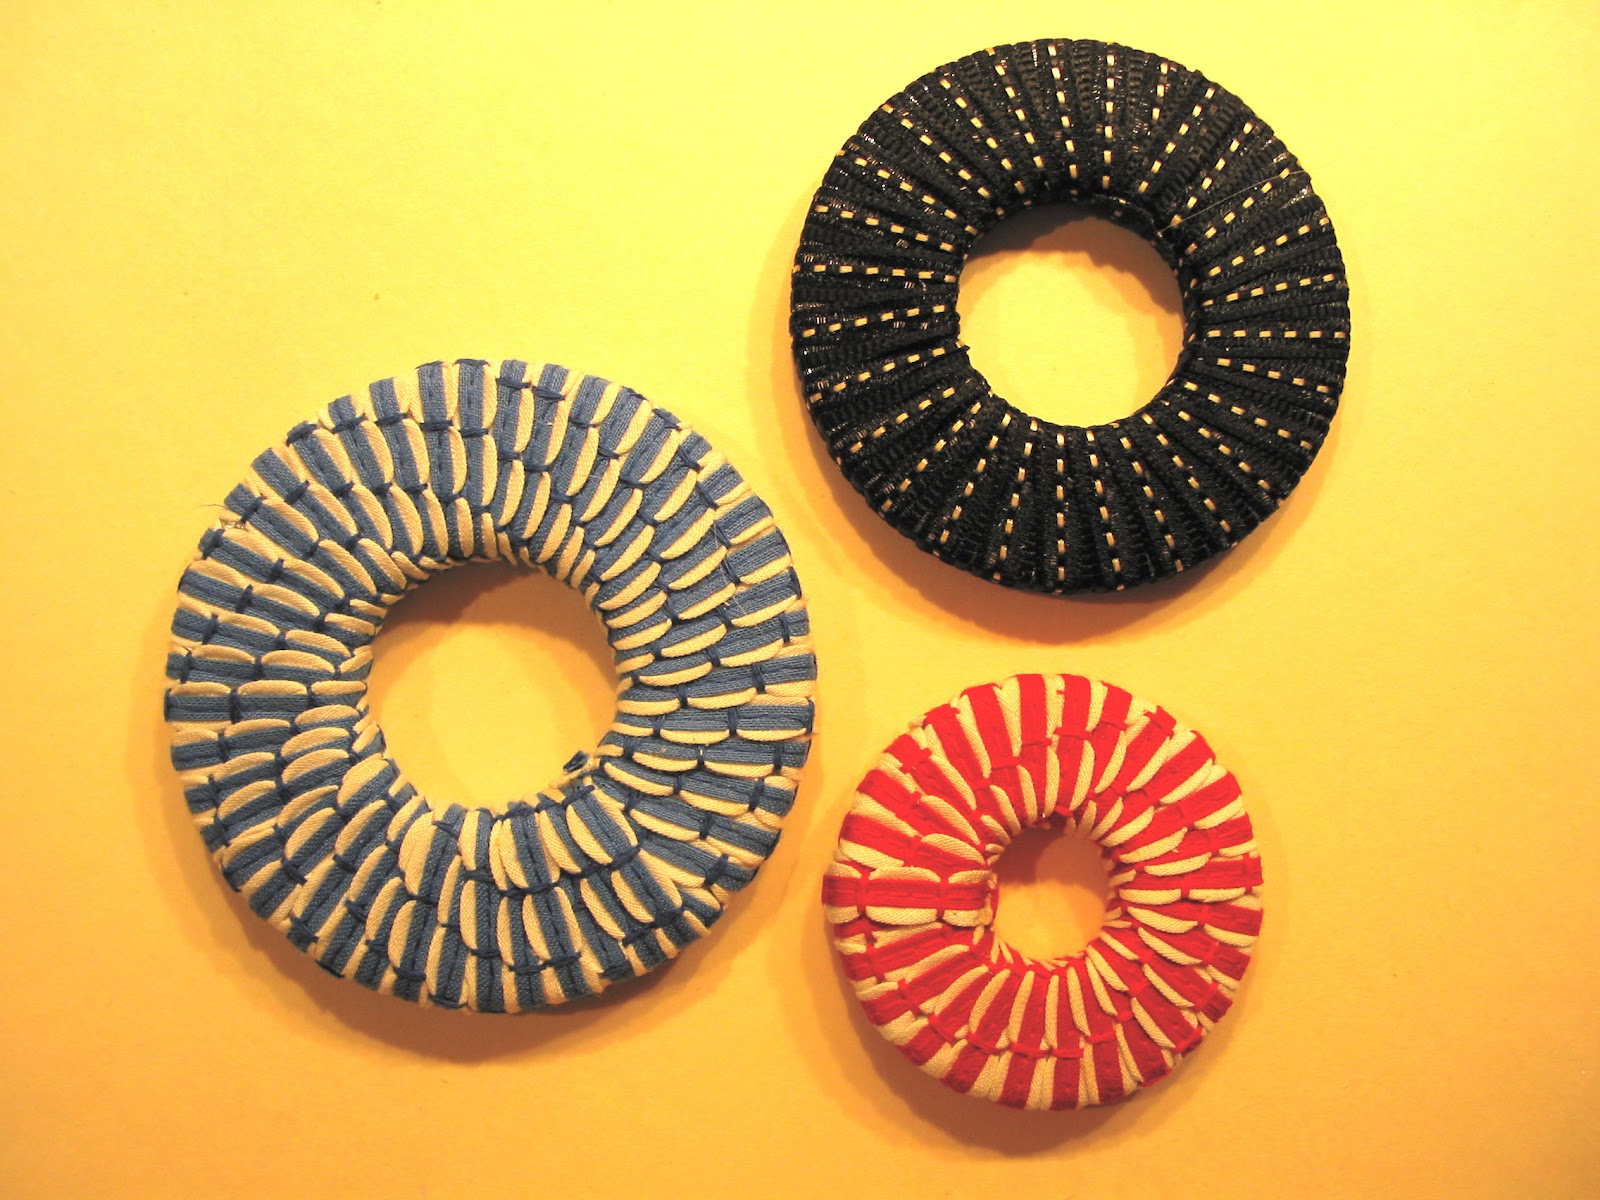
 |
| Finished Pattern Weights |
All I bought for this project was a few more washers; everything else was from stash, mostly "yard sale vintage". I loves me a good old estate sale where a seamstress lived - you can nearly always uncover some wonderful treasures for pennies :)
More than once I've ripped a bit of pattern tissue with my uncovered washers, so this not only softens the edges of the metal washers, but the fabric and the weight of the doubled washers holds the patterns in place better. And they add some fun and color to your work space! For something so quick and easy, this is definitely a win win win!
And in keeping with the season, as a bonus, you could whip a few of these up as a gift for your favorite sewist :)
19 comments:
How fun!
LOL "Avoid the bix box stores" SOOOOOO true and the reason is: they never re-stock the drawers for loose hardware! You will find no large washers there. Zero, zip, nada. Maddening. Also I've glued a few washer to old CD's to increase their surface area which is handy on large pattern pieces :)
Such pretty pattern weights! I have washers,but haven't got around to wrapping them, which is something I've intended to do. You inspire me.
Very neat idea. A great project to get the sewing mojo back in gear.
They're so pretty! I would want to wear them!!
Pretty!!!
Pretty and useful! Great combo.
Gluing on to a CD - brilliant!
I have to admit, that although I use the washers, they are, at present, the naked kind! Whether due to self-imposed expectations, lack of time, ... I am sooo behind with my sewing plans, dreams, etc. that I may just to have to dream of a sewing world where such pretties are the norm
Yours came out great, JillyBe! This is also on my list, of course. :)
I'm more than happy to inspire :)
But of course ;)
Thanks for the tutorial on these - I am not entirely sure where to buy giant washers here in the UK, but I must give it a try because I use my rotary cutter more and more these days.
i so need to do this! Your weights are so pretty, Jilly.
What a cool idea.
Those are great... Merry Christmas
I've wanted some of these weights forever, and yours are sooo cute! Maybe I'll finally make a few.
So cool! I'll have to try this. Right now, I use measuring cups and random items within arms reach as pattern weights. It would be great to make these -- thank you for the tutorial. And best wishes for a wonderful holiday season!
awesome tip. can't wait to make a slew of them. thanks for the tutorial.
Post a Comment