This often leads to some form of a time-consuming obsession.
Time-consuming obsessions are usually some combination of fun, education, mistakes, "aha!" moments, frustration (usually minor...I'm too old to get caught up in such things anymore. And (when sewing is involved) seam ripping. And did I mention lots of time consumption?
This idea had all of the above components.
But mostly fun.
And in the end, a wonderful sense of satisfaction. :-)
(WARNING: This is a long and potentially eye-glazing post, unless you're actually curious about the process of printing on fabric from the comfort of your injet printer...)
Backing up to the idea - I wanted to make a book for a baby's first birthday. Out of fabric. Beyond that, it was merely a dim light bulb, other than the fact that I had made an activity book for this baby's aunt - so many years ago that said aunt is about to graduate from college, and I could barely remember how I had done it! When I heard that the original book was being used and loved at the new baby's home, it was clear that a new book for baby was a Must Do.
The next bit of inspiration came when I found this:
More inspiration came when I was sewing with a group of friends a couple of weeks ago, and someone was actually making a children's book using this fabric, which I totally fell in love with:

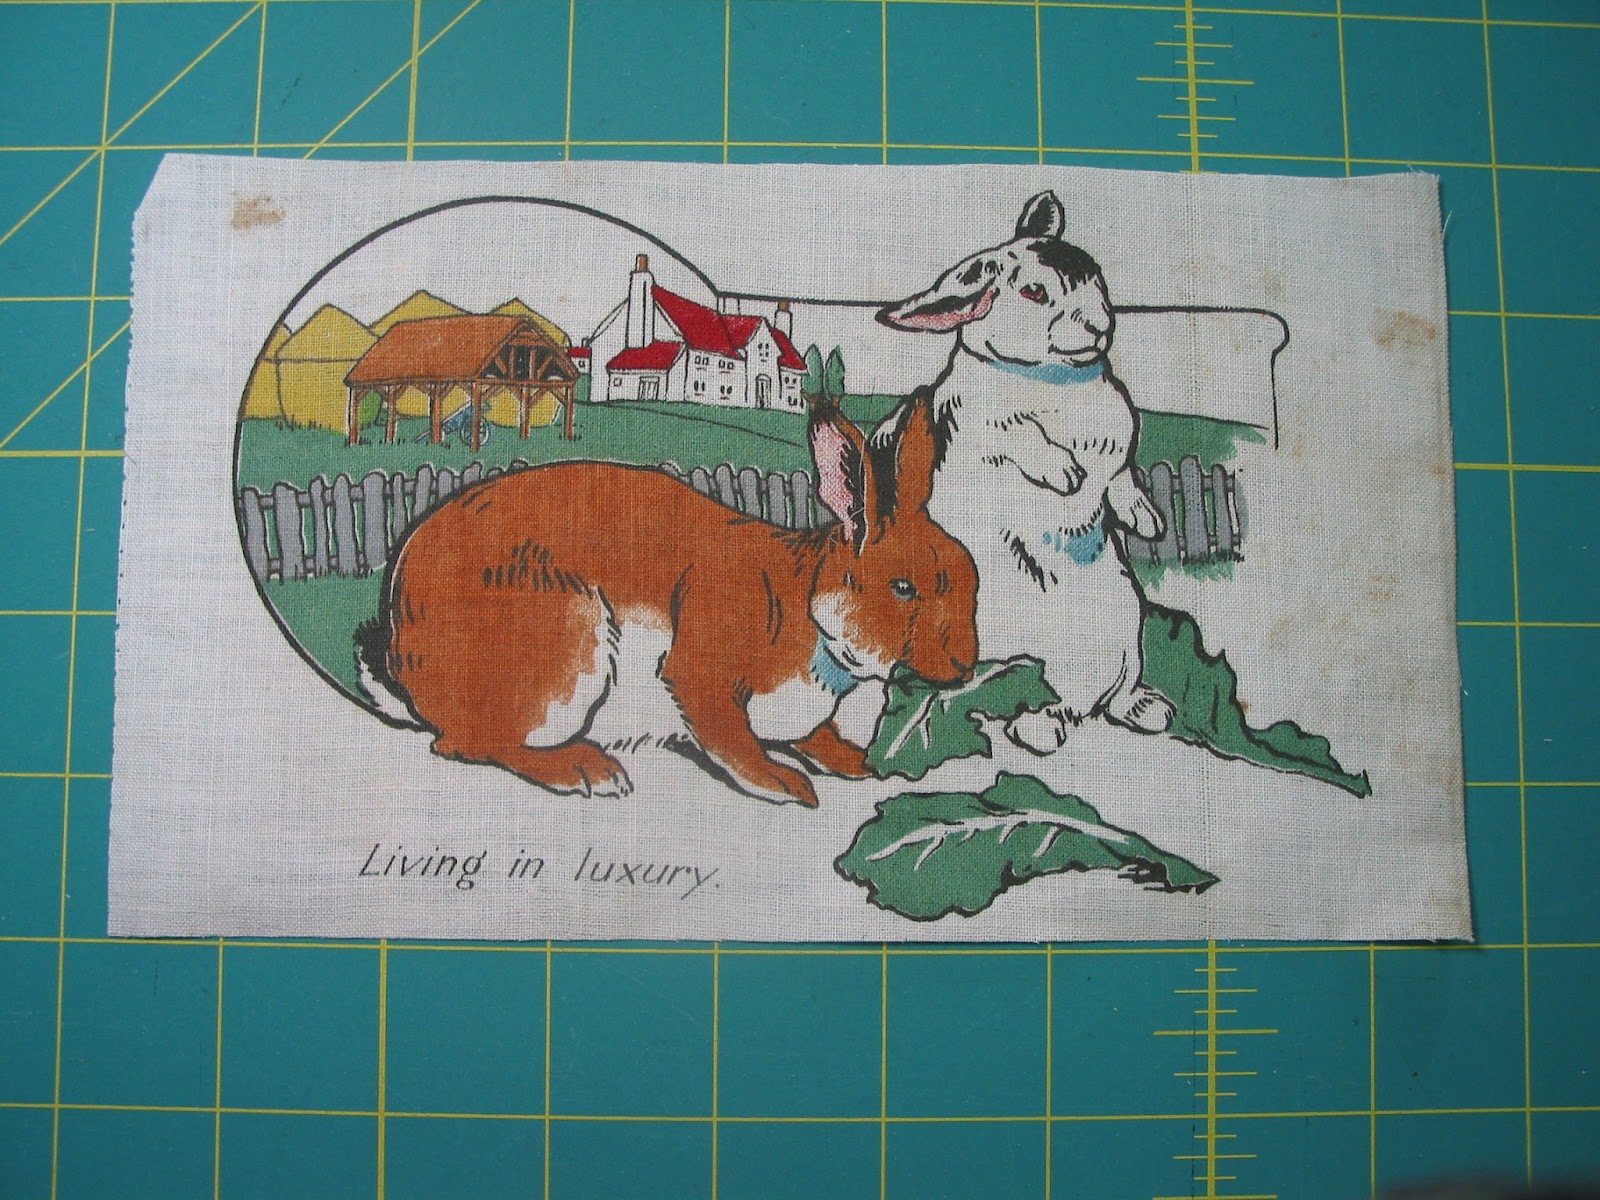
Even more inspiration came when Denise at grrl + dog posted these delightful freebies from a 1948 children's book she had found - not only were they perfect for the thoughts that were starting to roam around my brain, but I actually remembered all of the pictures! Clearly I had the book when I was a babe. Perfect! Just one example:

Next started the research on printing on to fabric. I had printed images from my inkjet onto those sheets of pre-prepared cotton fabric sheets before (also available in polyeter) but really disliked the fabric, not to mention the exorbitant cost!
I researched the interwebs. I called stores known for their expertise in dying fabric. I was not getting the info I wanted, which was how to print from my inkjet on to my own fabric and have the dyes be permanent, but done in a relatively non-toxic manner. (relative being a very subjective word, as it turned out....)
Here's a bit of info about what did, and didn't work:
1. I pre-washed all of the fabric.
2. Some fabric was pre-treated for dying, some was not (detailed below)
3. Fabric was ironed on to freezer paper
4. Fabric + freezer paper was cut to size, then run through the printer
5. Freezer paper was removed, then printed image was pressed with a hot iron.
6. Printed fabric was treated again, with various methods.
Ingredients used:

- Bubble Jet Set (BJS) Ingredients: Water, Preservatives, less than .001% Formadehyde
- Bubble Jet Rinse (BJR) Same ingredient list as BJS
- Sea Salt (non iodized)
- Soda Ash Fixer (Sodium Carbonate) - "mildly caustic"
- Dharma Dye Fixative (DDF) - Contains Methyl Alcohol and Formaldehyde (less than .75 parts per million)
- Jacquard Synthrapol (sorry, didn't make it into the picture) Contains isopropanol (rubbing alcohol) Although I have no concern about rubbing alcohol, I've since learned that Dharma makes a Synthrapol substitute that does not use it.
All of the above come with warning labels, wear rubber gloves, good ventilation, etc. SO not the direction I wanted to go in, and I want to continue researching alternatives, but in the meantime, I subjected my brain and nervous system to the evils of chemical-land, trying to find out how to use methods that were as clean as possible and still get lasting results.
I might add that the cloth I started with was organic cotton/linen blends. (insert image of me rolling my eyes here)

4, 5 and 6 were pre-treated with Salt and Soda Ash fixer.
After printing, #1 was treated with Bubble Jet Set. The colors faded a bit, but not much.
#2 was treated with BJ Rinse. Fail.
#3 was treated with Dharma Dye Fixative. The colors were pretty good here too, but when I wrapped it in a towel to squeeze out some moisture, some dye transferred to the towel.
#4 was treated with BJS.
#5 was treated with BJR (another fail)
#6 was treated with DDF - good color, no dye transfer on to towel.
I tried another set, but this time pre-treated the fabric with BJS (this is the stage when BJS is supposed to be used; i.e., before printing).

#2 Set with BJR (the stage you are supposed to use it at). Colors looked good.
#3 Set with DDF. Colors looked good.
I cut each of these in half, and experimented with a final stage:

#1a - Washed in regular detergent (washing soda) in cold water
#2 - Washed in Synthrapol with hot water
#2a - Regular detergent in hot water
#3 - Regular detergent in hot water
#3a Synthrapol in hot water.
It isn't that easy to tell from the pictures, but the best results here came from pre-treating the fabric with Bubble Jet Set, and after printing, fixing the dye with Bubble Jet Rinse or Dharma Dye Fixative and doing a final wash with Synthrapol and hot water.
In the end, I chickened out a bit with all of the chemicals, and while I pre-treated my fabric with BJS, I skipped straight to the Synthrapol hot water wash, and did a whole lot of very hot iron pressing and setting, hoping that would be enough for the finished piece to last many years.
Some notes on the Bubble Jet product - this is designed to be used with printers that use dye-based inks. My printer is a Canon that uses dye-based inks for all of the colors, and pigment-based inks for the black. So we'll just have to wait and see how well it all lasts.
Here's the process, in more detail:
1. Pre-wash and dry the fabric
2. Treat the fabric with Bubble Jet Set. Note: this is expensive stuff, but the good news is that it's re-usable! I just poured my used product right back in to the bottle. :) Don't squeeze the moisture out - let it drip dry.
3. Iron the fabric on to freezer paper (the smooth side) Cut to size.

4. Run the fabric + freezer paper through the printer, printing your image.

6. Now would be the time to use Bubble Jet Rins or Dharma Dye Fixative, if you want. As I mentioned, I decided to skip this step and went straight to...
7. A wash with Synthrapol and hot water. Hung the prints out to dry.
8. Pressed the heck out of everything. Again.
I definitely want to play with more printing, but I would like to research some eco-friendly options. I do have some people I plan on contacting, but if anyone has any hints, tips, or experience to share, I would love to hear it!
Meantime, I hope this helps or inspires other wannabe home fabric printers among us :)
Next up: The finished product :)
14 comments:
Thank you so much!! Not only did you list your steps in an easy to follow format, but you included all your product testing. I oew you the drink of your choice :-)
owe, not oew
I'll look forward to collecting in a few weeks ;-)
Don't worry too much about these levels of formaldehyde. 0.75 parts per million is next to nil. .001 is only 10 parts per million. Many fabrics contain more than that. Really, these levels, in a well-ventilated house, are much less of a concern than the cosmetics that most women wear.
I do a great deal of dyeing with Dharma products. I joke that, to earn my BS in chemistry from UC Berkeley, I had to pass a tie-dye test. But seriously, chemists do a lot of tie dye and we worry less about the chemicals used for dyeing than about household cleaners and cosmetics that most people blithely use.
This is pretty amazing! I would never have imagined that it was possible to print on fabric with a home printer. You may have the only tutorial on the web for this! Very creative.
This is very very cool! I will have to think about ways I might use this, though I would have to buy a new printer!!
You're on to something, Jilly!
cool! totally saving this for later!
What a lucky baby! The process doesn't seem to be too time consuming, now that you've done the prilimenary work;)
I'm really interested in the less toxic version as I have become so sensitive to chemicals. I'll stay tuned!!
Thanks badmom...I do understand that the formaldehyde levels are low, but still....
I'm one of those people who reads ingredients on everything, and buys lotions, cosmetics, & household cleaners with eco-responsibility in mind, so even a low level of formaldehyde makes me frown at the knowledge that I'm consciously choosing to use it :(.
My biggest guilty pleasure is definitely the fabric I buy! I KNOW I could be more conscious about eco-friendly fabric...but then I would have to say "no" to all those fabulous stash building goodies! ;-D
The formaldehyde levels in the BJR and DDF is a negligible risk compared to printer ink. Those cartridges need to be used with caution and disposed as toxic waste when emptied.
Do you check the ingredients on your cosmetics at this website?
http://www.ewg.org/skindeep/
Unfortunately, in the Reagan era zeal to get government regulations out of business, manufacturers of household cleaners were no longer required to list their ingredients. The original loophole was for trade secrets and patented processes, but it effectively means most people have no clue what chemicals they are spraying in their homes when they "clean".
One part in 10^5 or 10^6 formaldehyde is small potatoes compared to what people unknowingly spread on themselves or in their homes. That's the real tragedy.
http://badmomgoodmom.blogspot.com/2011/04/thinking-beyond-pink.html
That's a good link, the ewg site; thanks! I am pleased to report that almost every one of my household cleansers scored an A :-) My skin care products tend to be small companies that use live and/or organic ingredients (Benedetta, Eminence) and weren't even listed. Makeup is another matter....I know I still need to make some changes there - I'll definitely earmark this site!
I do know about the Reagan anti-regulatory debacle and the disasters it created on far more than our household products....but we won't go there..... ;-)
Oh yeah, I forgot to comment on the printer ink.....I was afraid of that, but couldn't find any detailed info. Not surprising. :(
Dharma suggests Synthaprol, THEN fixative. Did you try that?
Post a Comment