
This post is one in a continuing series of my desire to sew workable clothing for my darling, and aging, Mother, whose needs are shifting as her body, and her abilities, shift. As she become less mobile (she's quite crippled with rheumatoid arthritis, and getting weaker), her clothing needs are shifting, so my brain is trying to wrap itself around ways to make life easier for her (and for me, as her caregiver)
The goals at the moment are to make (or adapt) clothes that are:
1. Easy to get on & off while she's seated
2. Easy to open at the back for bathroom needs.
3. Necklines that are small enough to keep her neck & chest warm, but large enough to slip over her head.
4. Comfy!
5. Fitted enough at the neck & shoulders to stay on, but loose everywhere else.
Buttons down the front require a lot of twists & turns & leaning forward in order to get the arms into the sleeves. The same sort of manipulations are necessary when slipping a top over the head - if the neck hole is large enough, it's going to slip off her shoulder at some point. The best solution I've come up with, that meets ALL of these points, is clothing that opens at the back. I have another slip-over-the-top adaptation that I'll address in another post, but this post is all about skirts.
Note: This post is meant to give ideas on how to adapt a skirt pattern - I'm gearing it towards beginners (with some experience), but it is not a complete tutorial; it's simply meant to be a (hopefully!) helpful addition to the pattern you are adapting.
An addition to my list of "what-I-love-about-estate-sales" is Old Patterns! I'm still finding uses for the goodies from one craigslist find (I FILLED my car to the brim with sewing goodies - including my dress form - and all free free free!....except for the fact that I worked my washer to the bones getting rid of the smoker's smell from all the fabric....but hey.....).
This old see & sew pattern gave me exactly what I needed for a skirt:

Pleated in the front, to allow for tummy spread on an otherwise rather tiny woman.
Waistband.
General darts locations in the back.
That's pretty much all I needed. Easy enough to draft yourself, but I'll take the easiest route possible whenever I can, & I don't feel the need to re-invent the basic wheel if I don't need to ;^). Any basic skirt pattern would be easy to adapt - you can use pleats in front & gathers in back, gathers all the way around, even a more fitted skirt if you want, but I think that a more casual skirt with lots of ease is probably a more practical choice for someone who spends most of their time seated.
This particular pattern had pockets & a back zipper - I eliminated both of those, and redrew the side seams to eliminate the pockets. BTW, my model is understandably reluctant to go through many fittings, so I just laid the pattern pieces on a skirt I had previously made, for sizing.
PATTERN CHANGES & CUTTING ~ For the back pieces, I extended the left side, at Center Back (CB) by a couple of inches, and extended the right side at CB by about 10". The size of the wearer will determine how far you want to extend the pieces. The back pieces had darts, for shaping - I added an additional dart in the extended piece.
I cut the waistband long enough to extend around the wearer's waist to end just in front of the side seams. You will need to have a waist measurement of the wearer - cut your band the length of the waist, plus enough so that the band will cross itself in the back, and extend on each side as far towards the front as you want it to go, plus seam allowances. The waistband will extend further on the short side of the back.
 |
| Simplistic drawing showing the basic layout of the three skirt panels and the waistband. |
SEWING ~ If you're working from a pattern, you can simply follow the pattern instructions (up to the waistband installation) for most of the skirt, eliminating any zippers, & ignoring the back seam instructions . My following notes are just the basic steps I took for this skirt.
Pin your pleats in place

Baste the pleats, starting at the waist, and sewing down a couple of inches. Now is a good time to stay stitch the waist as well, for stability.

Pin, then sew, all of the darts. Press towards the center.
Sew up the side seams, and finish your seams.
(On this skirt, I staystitched the seam allowances, then pinked the edges.)
Finish the edges of your back pieces as well. I simply turned under the edges 1/4", stitched, turned again at about 1" & stitched again - essentially a machine stitched hem.

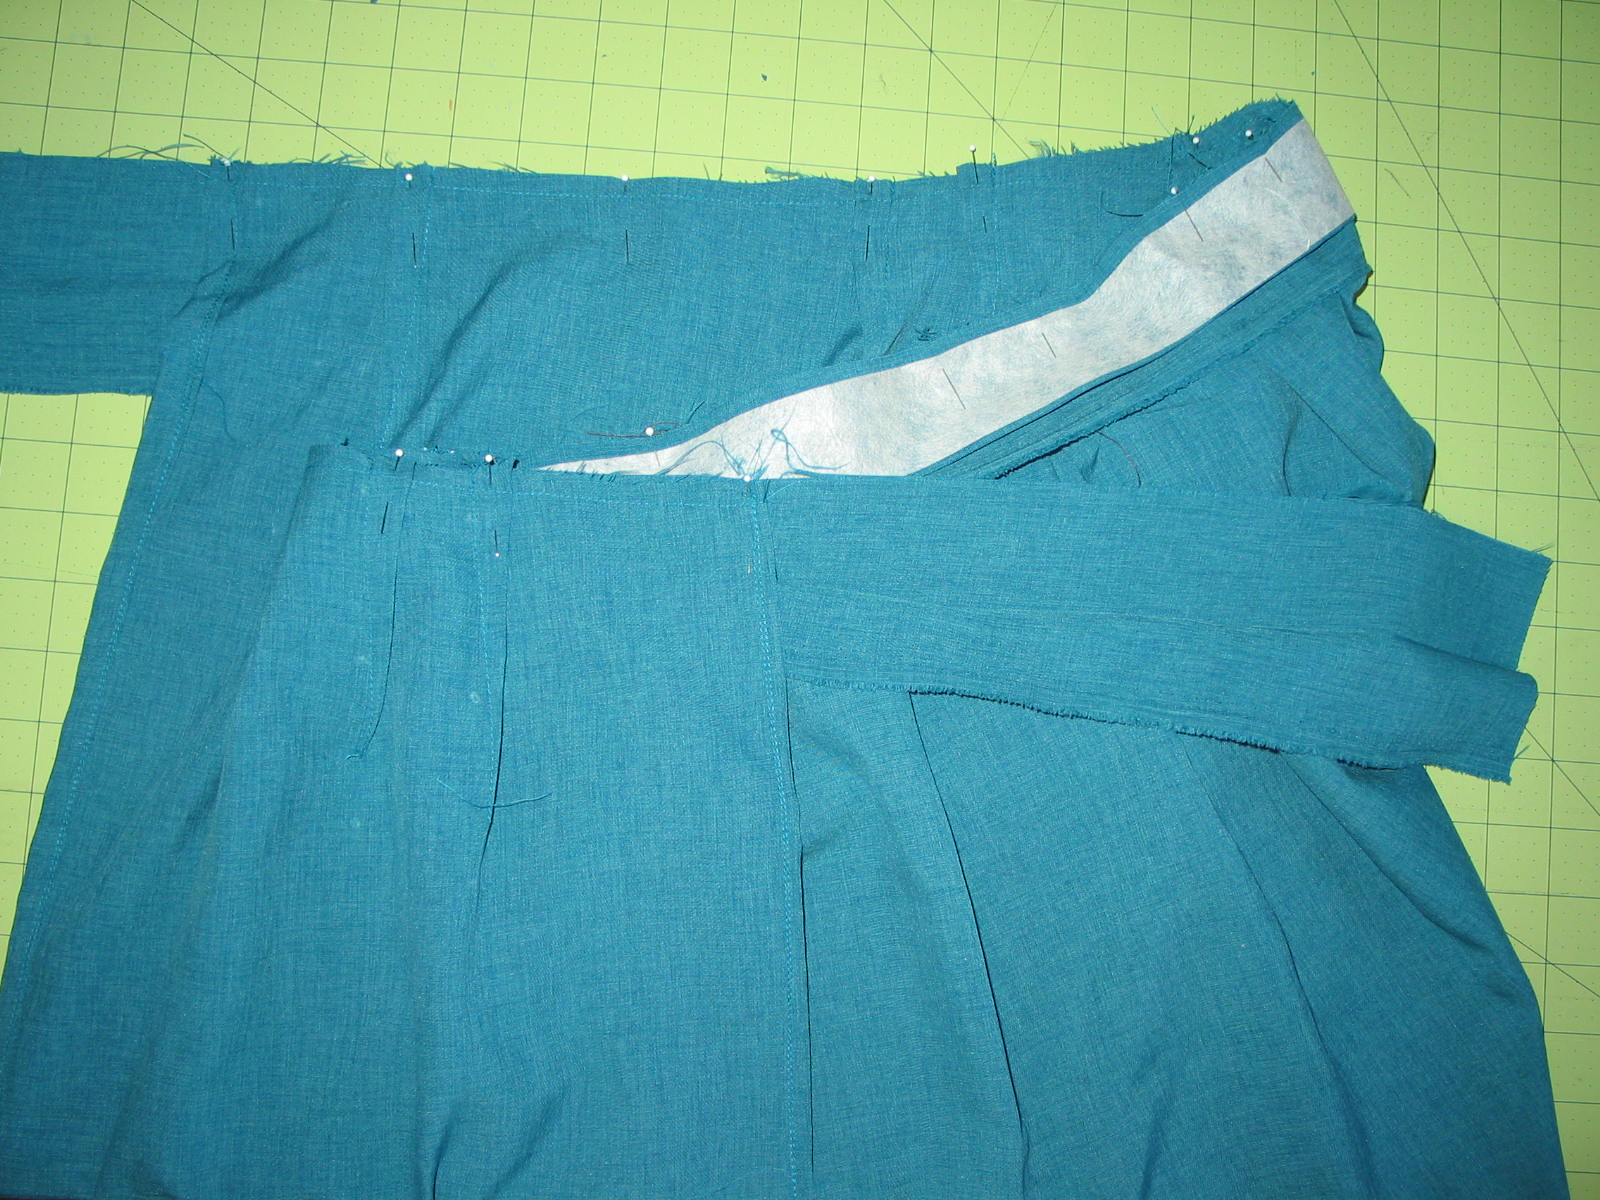
I added fusible interfacing to my waistband.
You can fuse the entire band - for this one, I just fused one side.
A note on interfacing: Interfacing adds stability - unless your fabric is very stable & beefy, you probably want to add it to a waistband. I have a stash of inexpensive Pellon interfacing, which is what I used here, but I do NOT recommend it!!!! If you care what your work looks like just get some good stuff & save yourself some puckers (on your fabric, and on your face, from all that frowning!) I recommend buying from Pam Erny at fashion sewing supply
Continue following the instructions on your pattern for waistband installation, but pin your band in place following the drawing above, extending the band from both edges, with a longer extension on the shorter back piece.
Pin the Right Side (RS) of the band to the Wrong Side (WS) of the skirt, and stitch in place. Trim the seam allowance, and press seam toward the waistband.
With RS of the waistband together, fold in half, and stitch the extended edges together. A tip on getting a sharp, crisp corner: Stitch once all the way to the edges (don't pivot at the corners). Then set your machine for a shorter stitch, and stitch a second time, but this time pivot at the corners - however, don't pivot a full 45º; instead, pivot halfway around the corner & take one tiny stitch, then pivot the rest of the way & continue. Trim your seams, & clip the corner up to the stitching. Turn the band & press.

Your instructions may have had you turn & press the other long end of your waistband before stitching it on to the skirt. If you haven't already done that, turn & press now, & check to make sure that your band is and even width all the way. Pin the band in place, and stitch from the right side, through all layers (both sides of waistband and the skirt). I did a 'stitch in the ditch' method, so that the stitching is hidden on the outside of the skirt, but you can topstitch along all edges of the waistband. (Sorry, I won't go into details about this step here - this is really just meant as a basic 'how to alter a pattern' post)
Now you can add a buttonhole to the band for one end of the band extension to pass through. (It really doesn't matter which side you place the buttonhole on; there's no 'right' & 'wrong' here) ;)
This is not my prettiest buttonhole, but it does the job. You want it to be wide enough for the band to pass through easily, but still have good reinforcement on each end.

For ease in both construction and getting dressed, I'm a fan of velcro! Add a strip, or a square, on the end of each waistband extension, and the mate in the appropriate spot on the band. This would be a good time for a fitting, and you can also check the length.
Hem the bottom....

And you're done!
Unless you've narrowed the ends of the waistband, you'll get a little puckering where the band passes through the buttonhole. Since this was basically a prototype skirt, I'll likely narrow the band extensions next time.

Finished Front
I hope that someone out there finds this helpful :). Many of us will be finding ourselves in the position of being involved with an aging relative, or someone with a disability - no matter which side of the equation we are on, may we be there with grace, and do what we can with a smile in our hearts :)
7 comments:
You're showing up on my blogroll! :)
Another nice garment for your mom. As for tops, what about a keyhole top? Or something with a slit that overlaps to a snap?
I can see this requires much thought. :)
Thanks shams :) For some reason, this post just flipped off into never never land...apparently it shows up on peoples' readers, but I don't think it showed up on anyone's blogroll. (I think I have the terminology right....)
Anyway, no matter; the posts are here, so all's well that ends well :)
I'm still playing with ideas for tops; I do think that a slit in front that overlaps is a good idea. I tried refashioning a top into one that didn't have real sleeves, but I'm not so sure that actually makes anything easier. I'll do a post on that soon....she definitely needs tops, now that I've figured out how to make a workable skirt!
Funny thing is, the need to do alterations for her was really what gave me the nudge into getting back into sewing - I have so much to thank her for now! ;D
I am very familiar with OA. My mother was crippled with it also, and I was her caregiver for many years. It is a very difficult disease. So painful and debilitating. Those afflicted can't button things or even pull up elastic waist garments. Zippers--forget it. Shoes are a huge issue. Best wishes to you both.
I think this is my favorite post of all. Some background: I am a part time helper to my mother in law who has Alzheimers combined with several other debilitating health problems. I am just now considering making special clothing for her. I will take your advice about back buttoning tops and a back wrapping skirt. I also think the keyhole/snap idea is excellent, thanks Shams.
She prefers pants but might go for a skirt such as yours as the the weather is hot. Family is visiting from far away next month and I can make her a comfortable and cheerful floral outfit for the occasion. We are never to old or ill to be pretty.
quote: "We are never to old or ill to be pretty"
That put the BIGGEST grin on my face!!!! I think I'm printing that out & putting it up as a reminder - wonderful words :)
Thank you for your kind words yarndiva - I hope you share your creations for your MIL!
gwensews bless you - it's impossible to know what it's like to be a caregiver until you're there...& even then, of course, every situation is different.
It's a challenging blessing, but then, so is life ;^)
Hi Jilly! Thanks for your willingness to share - it's a challenge to figure this all out, then another commitment of time to blog about it. My mom has osteoporosis and arthritis and I've often thought I should sew for her versus trying to find styles that (almost) work in RTW. I didn't have the courage until I saw your posts about your mumsy. All the best to you both.
Irene
Post a Comment