It's about exploring and sharing my creative adventures (mostly sewing these days) ~
~those activities that sometimes obsess, usually inspire, occasionally frustrate
~and always provide a delightful maze to wander through.
Showing posts with label Wabi-Sabi. Show all posts

Monday, June 17, 2013

A Scarf, A Bag, and A Graduation.

Oh the grand blogging plans I had!   Me-Made-May wrapup and brilliant philosophical recap; book reviews of Overdressed and Balenciaga, all of the fabulous ideas that were to be sewn and reviewed between then and now.....

And then Life happened.  It does that.   It's a good thing :)

I have been sewing (a bit); so I'll sneak in a quick show & tell of the gifts I sewed last month, which will (hopefully) get my blogging fingers back in motion and I'll catch up and carry on....

It's graduation season, and I'm one of the lucky ones who has a Special Person graduating from college this year - her ceremony was last weekend, and of course, some hand-made items from me were in order.  First up, another Wabi-Sabi scarf (Method described here).  This one was all hand-dyed by me, in turquoise colors that I know the recipient wears a lot of:

Dyed Scraps of Silk:

Ripped in strips and woven
(laid on top of dissolvable plastic):

Close-up:

After Sewing the Strips Together,
and Trimming the Edges:


I also made a bag for The Graduate, using Kayla Kenington's "K-Bag", or "Kangaroo Bag".  

REALLY fun to make!   And I loved the results :)
It's a simple tie closure at the top, with 4 large pockets on the outside:
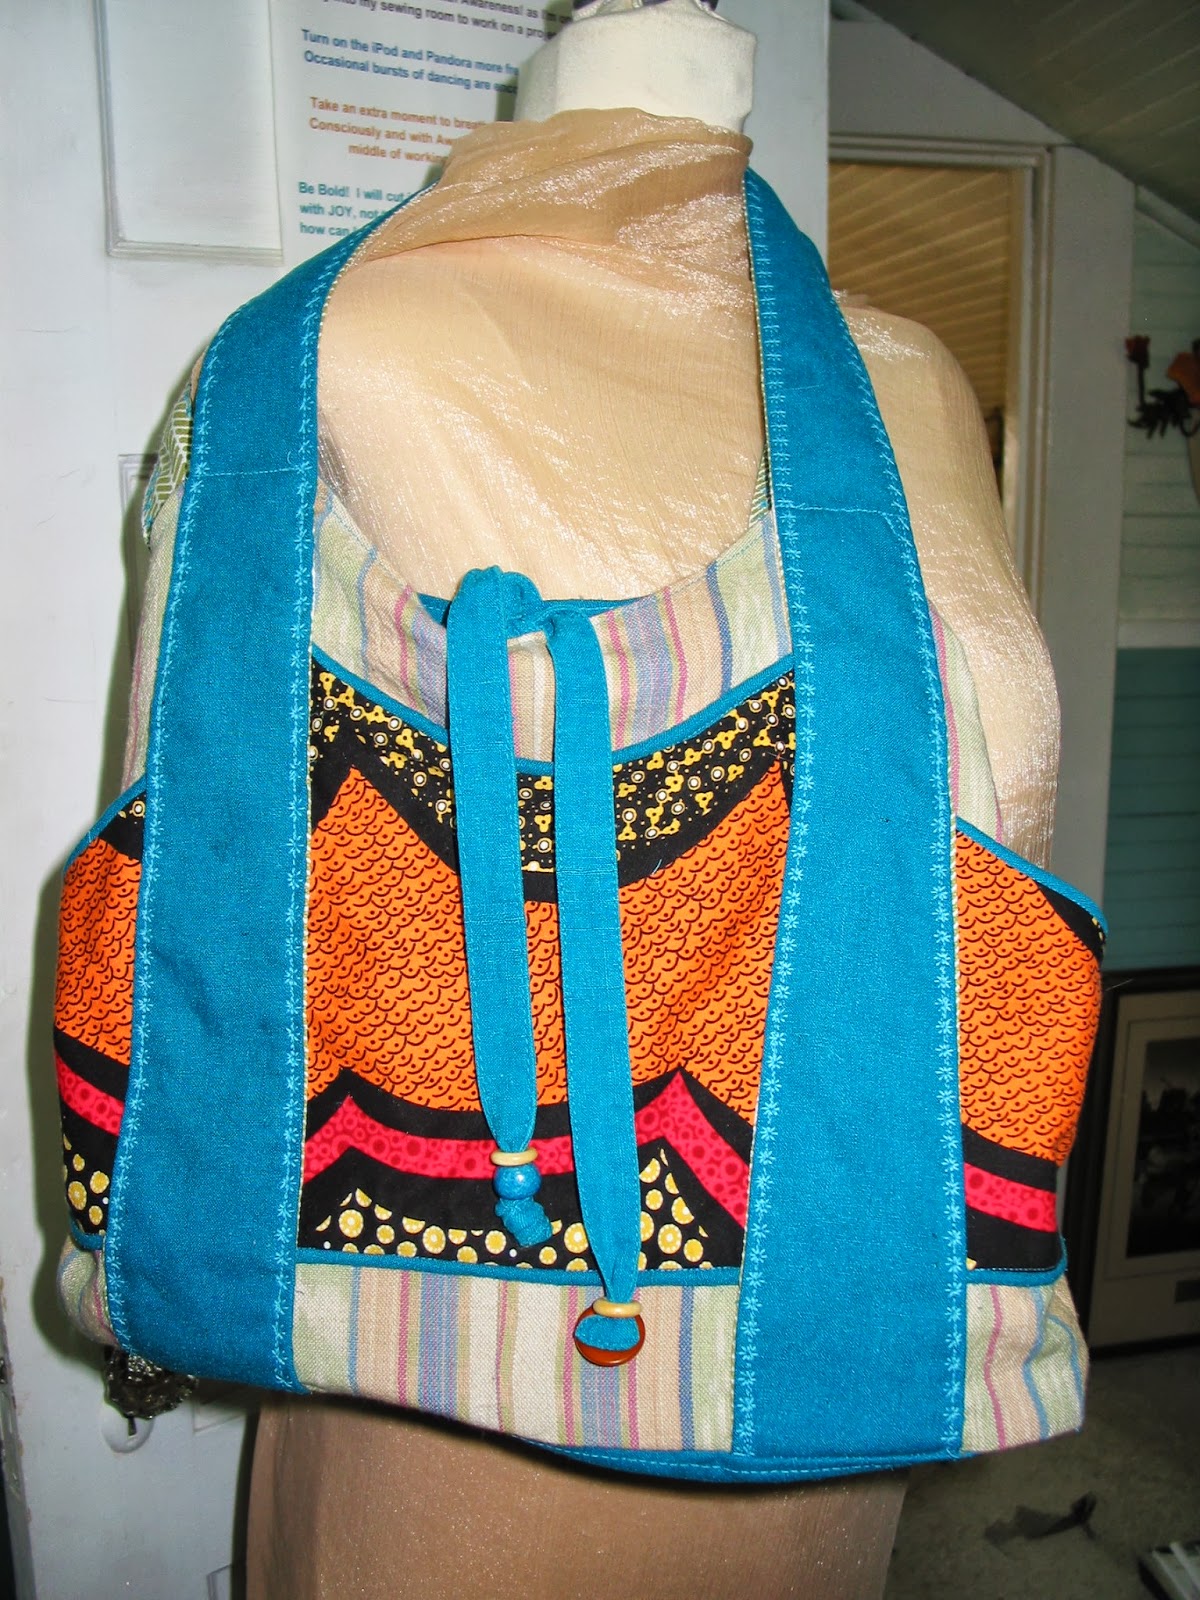
Fully lined, with one pocket on the inside:


Close-up showing the decorative stitching I added to the straps,
and the piping along the top edge of each outside pocket:

Materials Used:  Raw Silk from a never-worn dress given to me by a good friend who figured I might use the fabric :), cotton from stash, buttons and beads from my beading days.

Construction Notes:  There are two options for the bottom of the bag; a "paper bag" method, or the addition of an oval.   I used the oval option, and added some thick Pellon interfacing that is, I guess, designed for this sort of thing.  (I've had it in stash forever, and this is my first time using this sort of stabilizer, so I don't know exactly what it was I used)

The instructions are clear IF you read them VERY carefully.  I stitched both handles on through both thicknesses (the bag and the lining) before realizing that there was no way to add the oval bottom to the bag and lining separately once they'd been stitched together.  It took a careful RE-reading of the instructions to realize that you were only supposed to sew the handles on to the OUTSIDE bag, not the lining.

Unpick.

Redo.

Sewing the bottom piece on to the bag and lining separately leaves it being very prone to "wander" off center, so I stitched through all thicknesses (both oval pieces plus the interfacing) to stabilize it.   This is clearly meant to be a very casual, floppy sort of bag, but I wanted SOME structure and stability.   

All in all, a very fun piece, with lots of room for creativity!

Presents were opened at the tail end of the day, and I have no pictures of The Graduate with her gifts, but here's one of her and her Proud Auntie:

Tuesday, April 16, 2013

Wabi Sabi Silk Wrap

Wabi Sabi ~ that perfect beauty that arises from natural imperfection - impermanent, authentic, incomplete.   That tiny tilt in a piece of pottery that catches your breath, the smudge of a stray  stroke in a work of art, the frayed edges of a ripped piece of silk that brush your skin...  Everything about this concept appeals to me!  So when a wabi-sabi workshop appeared in my reality, I had to know more....

Even though the meetings and workshops are an hours drive (each way) I signed up for membership in PENWAG (Peninsula Wearable Arts Guild) this year because of the amazing sounding roster of speakers.   I was really looking forward to hearing Brecia Kralovic-Logan speaking on "Wabi Sabi Wearable Art", and was so impressed with her presence and approach to teaching creativity that I signed up on the spot for her all-day workshop, even though it meant another 2-hour drive the next day.

As it turned out, there is no place I would have rather been than where I was in that workshop!  We spent the morning dying pieces of silk habotai and organza, using Colorhue dyes.  The advantage of the Colorhue dyes is that they are an instant dye on silk, which is great if you don't want to wait out the processing time necessary in some other dyes.  The sunny, windy day dried our strips in mere moments (until the sprinklers came on), and after pressing, we ripped our fabric in to strips, ready for weaving.

Here are a few samples of the dyeing and weaving done by workshop participants:

The weaving was done by laying down a sheet of water soluble backing.   We used hospital laundry bags (!), designed to dissolve in a hot water wash after being filled with contaminated bedding, etc.   Brilliant, eh?

Then you lay out your fabric by weaving, or layering cut pieces, or making some sort of arrangement with fabric bits - the possibilities are endless!   You top your piece with another layer of the water soluble plastic and pin everything in place.

Brecia admiring one of the student pieces:
  
I dyed my fabrics in a couple of different colorways, and wanted to use the earth tones in a scarf.  I added some fabrics that I brought from stash in order to have enough to make a nice long scarf.  
The darker pieces of fabric in my piece are silks from stash; the lighter pieces I dyed during the workshop.
My piece, woven and pinned and ready to sew:

I sewed down the center of each strip of fabric, both directions:

Once everything is sewn together, you give it a hot water bath (the hotter it is, the faster the process goes), making sure that the water soluble stuff is completely dissolved.   Dry it, press it, and you're done! 

I ended up with this:

Oops.  Not quite done.  I LOVE my colors!  But...  The dark copper-colored strips are a dupioni, which I felt took the process beyond wabi sabi and into sloppy, because of the loose weave and tendency to shred (note:  I said SHRED, not fray....).   After considering my options, I decided to even the edge along the long sides, and sew on a border fabric.   This not only gave stability to the dupioni, but added enough width to take it from a wide scarf to a wrap.  I sewed a French seam, which I then topstitched down, and did a machine rolled hem along the edge.

This is how my good clothes get ruined.  
It's not easy for a gardener to avoid picking up a tool and getting dirty
just by stepping outside for a moment....

The silk is, not surprisingly, a bit futzy and fidgety.
I may need to utilize pins to hold it in place.


Close up:

Here are the other two pieces I dyed in the workshop,
to be utilized elsewhere:


I'm in LOVE with this whole process!  Can't wait to play with the dyeing possibilities some more, and the weaving, and the piecing.....endless opportunities for fun here!  And I can't recommend Brecia highly enough - for her infectious enthusiasm, her delightful attitude towards the wabi-sabi approach to creativity, and her 'just right' method of teaching in an encouraging manner.   She's based in Santa Barbara - check her out if you can!  

How about you?  Have you had fun and success at fabric dying?  What methods, dyes, etc. do you love and recommend?