It's about exploring and sharing my creative adventures (mostly sewing these days) ~
~those activities that sometimes obsess, usually inspire, occasionally frustrate
~and always provide a delightful maze to wander through.
Showing posts with label Vintage Singer. Show all posts

Tuesday, July 5, 2011

A Spa Date with your Featherweight

Colette, as she arrived...no accessories other than the jewelry she's wearing, and her little box

My love affair with Featherweights began before I even knew about it....when I was a mere childling, and my darling Mumsy was sewing nearly all of my clothes on her Feather, brought with her from England.   Fast forward, (many) years later, to my renewed interest in sewing, one basic plastic fantastic Janome, (which is still working just fine for me), but before long I was yearning for that humming,  hard-working, satin smooth finish of the vintage Singer again.... I soon had a 201, which is still definitely the workhorse in my sewing room, but oh that Featherweight....it was still calling me....  until I finally replaced the Feather of my youth!   Once....twice....a couple more......... and each one, of course, received a thorough spa treatment at my hands - I don't know who enjoys it more, me or the machine (of course they have feelings!   How can anything that adorably cute not have feelings?!)

Here, finally, is my promised record of A Day at the Spa with Colette, the latest addition to my little flock :)  You may want to check out my previous post on Cleaning a vintage Singer for additional info - a lot of the process is the same for both, but I'll try to let this post stand alone with all the info needed.


Ingredients List:

  • A large towel for a work surface (it traps all the little  screws that you do NOT want to lose!)
  • Maguiar's Scratch X - Fabulous first step to remove those fine scratches and built up grime.
  • A good Carnauba Wax
  • WD-40 - Good cleaner for the gears & moving metal bits inside the machine (more about this later)
  • Sewing Machine Oil.  
  • Rags - I like old cotton t-shirts or dishcloths.
  • Sewing Machine Lube 
  • Screw Drivers. (use the right size!)  
  • Q-tips & toothpicks
  • Brush to clean out the fluff
  • Tiny brush to oil the little screws
  • At least one little bowl - one to hold a bit of oil, others to store & label the parts you remove from the machine (and you WILL want to label everything, until you're comfortable knowing exactly where that little spring or screw goes.....)
  • Manual
  • HIGHLY recommended:  Dave McCallum's book The Featherweight and I, and his DVD "Those Fantastic Featherweights".  A bit pricey, but you can find them on sale if you're patient.  (I'll provide links at the end here)
  • Replacement parts, as needed:   - Rubber Feet, for both the machine and the foot pedal - New felt liner for the tummy cover plate (aka drip pan) - New Felt for the spool pin - a spool pin spring  (links below for ordering)
  • OXO  Brite (the way cheaper version of OxyClean) to clean up the metal bits  (this didn't make it into the pic)
And the (Picture Heavy) Fun Begins....

Step One:  Set your baby on its side & inspect the foot pads:

They probably need to be replaced - remove the foot pads with a screwdriver - they might be really stuck in there, so you may need to do some digging.

Unscrew the knob in the center of the drip pan; remove the round felt holder, the drip pan and the old felt liner.   Toss the felts - they will almost certainly by nasty & stinky!   And I've actually never had THIS much grease sitting on the pan!   Ewww factor:

WD-40 to the rescue!

The old & the new :)

Now it's time to remove all the jewelry.   DISCLAIMER!!!!!  I remove the upper tension parts, just because I really like to get in there & do a deep cleaning.  Unless you have a good set of instructions, or you photo-document every single step as you dismantle it, do NOT do this yourself!   In most cases, it really won't be necessary.  ::whew:::  sorry for yelling....just had to say that :)

In spite of the above statement, I can be lazy, so this is how I like to clean the metal bits.   Instead of spending ages trying to scrub out every little nook & cranny of all those metal bits, I just toss a spoonful of OXO into a bowl, add some boiling water, & then let all those metal bits soak for 20 minutes or so.   Do not (gonna have to yell again here....) DO NOT place anything that has any lacquer on it in the bubble bath!  Umm....go ahead, ask me how I know.... 

Here they are, enjoying their bubble bath:

20 minutes later (after a THOROUGH rinse and dry....I mean, REALLY thorough...you don't want any moisture at all left....I'll even use a hair dryer on the pieces, if there's any humidity in the air)

Colette said it was OK to show a nude pic of her (she's French, you know....)


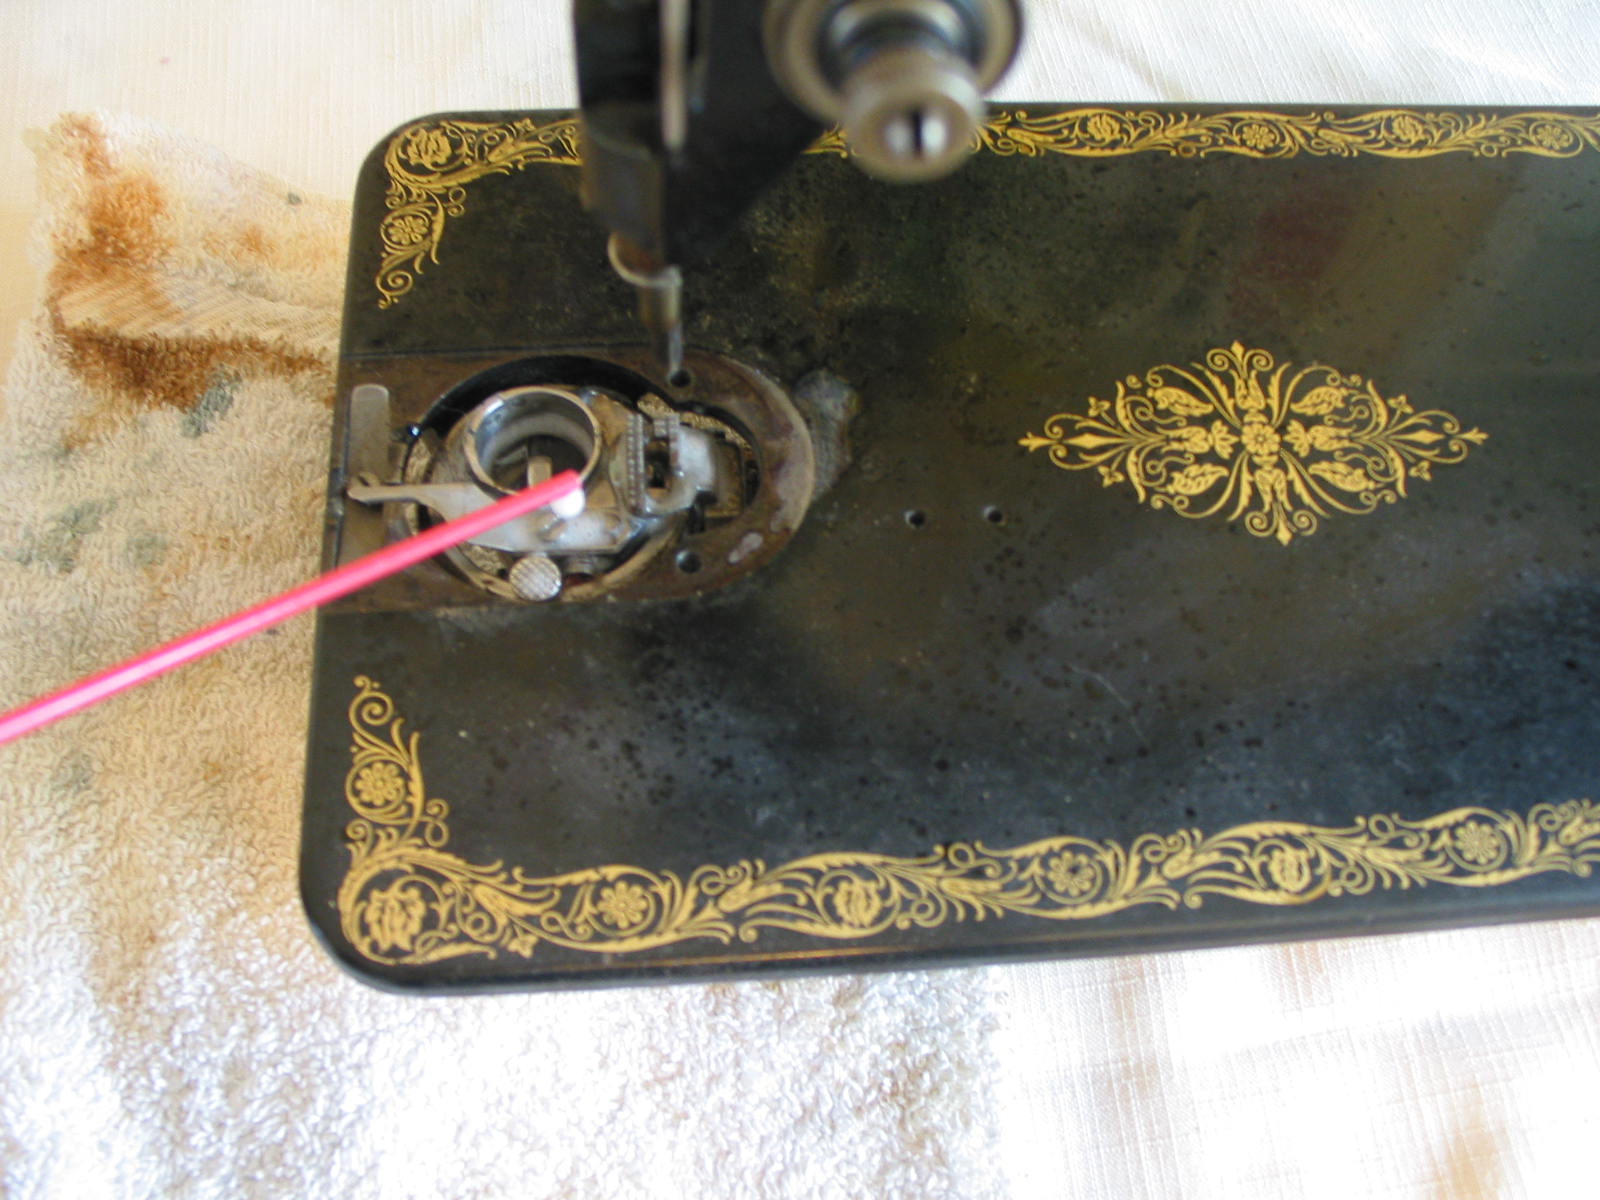
While everything is soaking, I start the internal cleanse.   Some people caution against using WD-40, but phooey on them.  The stuff is the BEST de-greaser & de-gunker for metal parts.  Just do NOT use it as an oil substitute, wipe it off well, & follow up with real sewing machine oil.   I give a squirt of WD-40 to the bobbin case area:

...and the gears under the spool pin (see that nasty old gunky grease?)  If the underbelly area is gunky, use the WD-40 there as well.   Rub off the gunk, dry it well, & now you're ready to start oiling & greasing :) 


Now that you're done getting rid of the old, it's time to add the new.    Squeeze out a bit of motor lube & add it to the gear in the above picture, and the two gears in the belly area.   Move your handwheel, & make sure the gears are fully lubricated.  
Refer to your manual or other book & add a drop of oil to all of the necessary spots.   Just a drop!  A little goes a long ways :)

Now that the belly is fully, you can replace her undies.  Glue the new felt liner onto the drip pan (rubber cement works well), replace the pan with a fresh felt pad between the screw & the pan, & screw the new rubber feet back in place:  (BTW, I have probably a lifetime supply of red felt that showed up on my doorstep - literally - so I just make the felts myself)

And now the real fun begins!  Bring out your Scratch X (I LOVE this stuff!!!)  to give your baby the first step in its deep metal massage.   Put a small dab on your clean cotton cloth, & start gently rubbing a small area (about half of the drop-down arm).   If your machine is really dirty, it will feel like it's 'grabbing' at first, & you'll feel it start to let go & move more smoothly as it releases the gunk.   Don't let the Scratch X dry...move to a clean area of your rag & rub the Scratch X; you'll get the 'squeaky clean' reward!   For a REALLY dirty machine, you may want to repeat....I've never had to do more than 2 times.    You might want to practice on a small, hidden area at first....it's really wonderful stuff, just don't overdo it, and you'll be fine :)

You thought this machine didn't look too bad?   Look at what came off of it!:


And here she is after her first massage!   Her beauty is starting to emerge :) :) :)

Now it's time to for phase two of the deep metal massage - the  waxing.   Use a good quality carnauba car wax, & use it just like you were waxing your fine old vintage Rolls.  Apply a thin coat, rub it in, let dry, & rub the shine on.   Repeat.    NOW she's (or he) is ready to reapply the jewels!  (The male Feathers are just as flashy & jewel-loving as the females, I've discovered.   In fact, I think my snootiest & vainest feather is a male.....)  But I digress....

When you screw the bobbin cover plate back in place, here's a common mistake a lot of folks make - see the little finger that's sticking up at 12:00?   That's where it needs to be, right in the groove at the bottom of the cover plate.   Make sure it's in this position before screwing the plate back:

I actually like to do another full waxing massage after all the chrome & metal bits are back - I even wax the face plate & throat plate & some of the other chrome bits.   And then a stitch test.......Yes!!!   Perfect stitches!!!!!   (how rewarding is THAT, after all your hard work!?)  :D :D :D

And who's a pretty girl?  


Let's give her a flower!

I like to cut my oil-catching protector cloth long enough to protect the bed from the face plate screw before putting the baby to bed:

Of course, everyone else had to come out to meet the new addition!  They agreed to a photo shoot, so...just for fun, here's my mini-flock:
Clockwise, from the top:  Raggy G (1941), the victim of an eBay idiot who thought a sheet of newspaper in a huge cardboard box was adequate shipping protection (RG is now my gracious donor guy).  Stirling (1954), the fabulous (& he knows it) 222, Maxine (1951), the Centennial party girl, Sophia (1947), the elegant beauty who emerged from rough beginnings, and Colette (1952).


Helpful Links:
And....last, but most decidedly not least.... I have to give a MAJOR shout out for the blogless Lynn Rowe, Pattern Review's resident Featherweight Goddess, who has researched & deep metal massaged her feather-lovin' little fingers to the bone, gathering and sharing knowledge & information for the rest of us :)

*whew*  This took way longer than I anticipated, but those darlin' little feathers are worth every second of time you give them!    

Please, share your Feather stories with me -   I love hearing them!

Monday, May 30, 2011

Vintage Singer Love - How I Clean 'em Up (The Basics)

I posted about the 3 vintage Singers that followed me home a couple of weeks ago; now I thought I'd give a  step-by-step of how I do a basic clean up on one of the full-size ladies.   My techniques have been gleaned from research at places like the Yahoo Vintage Singers group,  David McCallum's Featherweight DVDs & books, various posters at Pattern Review, and lots of experimentation on the old machines that have found their way to my house.  Some of those experiments were not so successful - like rubbing your machine down with Gojo = epic fail, or dunking an entire machine in a tub of kerosene = epic waste of time, energy and $$$  (yes, people actually DO recommend those techniques!).   Folks do have their own favorite products & methods; what follows works for me. :-)

Here's Gabrielle - the machines belonged to a French woman, so they all got French names.  (....yes, of course I name my machines.   Don't you?).  She's the 1926 66 as she looked when she came in the door.   Well, actually, this is after I removed her from her treadle cabinet, which needs way more refurbishing than she did, but that's another story....
She really wasn't too bad - lots of dust, a little rust, a few scratches & some grimey areas, hand wheel was sticky, but I saw no serious issues, and the decals were really in very good shape.   And hey, it's a treadle!  A totally mechanical workhorse - not even any electrical wires to give concern!  It's hard to find an unfixable surprise with one of these beauties :)

Here are the tools of the trade that I use:
Start with an old towel or cloth as your work surface.
Then, clockwise from left:
  • OXO Brite (the way cheaper version of OxyClean) to clean up the metal bits. 
  • Maguiar's Scratch X - Fabulous first step to remove those fine scratches and built up grime.
  • A good Carnauba Wax
  • WD-40 - Good cleaner for the gears & moving metal bits inside the machine (more about this later)
  • Sewing Machine Oil.  
  • Rags
  • Sewing Machine Lube (Necessary for a machine w/ a motor - I didn't use any on this one)
  • Screw Drivers.  
  • Other ingredients that didn't make it into the pic:  Q-tips, small cleaning brush, tweezers, little bowls to hold all the little bits as you remove them, a camera or piece of paper to document any parts you dismantle until you know by heart which little spring & screw goes where, a good non-scratch Metal Polish, and a good manual for whatever machine you're working on.
By the way, even if you have the original manual for your machine, go check this site out for great, picture-heavy service manuals.   I have all of the info printed out for every model I own, and it is indispensable!:  Tools for Self Reliance  I seriously can't recommend this site highly enough!

Here's Gabrielle's gorgeous spoked hand wheel - there's something about these old spoked wheels - I just love them! :

OK, let's get started!   Step one is to dust her off - you can even do a wipe down with some gentle dish soap if you have a really grimy baby on your hands.   I then go straight to the metal bits, & start removing them.   USE THE RIGHT SIZE SCREWDRIVER.  Sorry for shouting, but this is how screws get stripped - make sure your screwdriver slot is a match for the slot in the screw - life will be so much easier if you just get into the habit of doing this right off the bat.   Need I add the infamous phrase "Ask me how I know?" ;D  Oh, and a note about vintage Singer screws:   each one is unique & unusual, and you will NOT find a replacement in a hardware store.  In fact, the only place to find a replacement for a missing screw is off another vintage Singer.   Translation: do NOT lose your screws!

I usually start by simply removing the bobbin cover plates.   What you find under here will tell you a lot about how well the machine was maintained.  Remove any threads & fluff that you find with your tweezers & brush.  I give this area a good blast with WD-40 & let it do its thing with all the gunk that is invariably built up here.   Then I'll wipe it down, removing any excess WD-40.
A note on WD-40:  This is is NOT a substitute for SM oil, but it is perfectly safe to use on your metal parts.   It's an excellent cleaner - just don't get it on any rubber bits, & wipe up any excess.

Once I have the bobbin area cleaned, I'll start removing all of the other metal parts.

Remove the hand wheel by unscrewing the chrome disc in the center.

There are a number of different bobbin winder types.  If you have one that looks like this, PROCEED WITH CAUTION!   There are a few types that have a spring which will fly across the room as soon as it's released.   When it does this, go find it (You're doing this in daylight, right?)  Then curse a bit when you realize you have no clue just how, exactly, it fit into the slots & holes that it just sprang out of.   Don't worry, you'll figure it out.   Eventually.

Can you see the little spring just behind that forked bit?   The bit that looks like cute lil bunny ears (but is really devil's horns in disguise?)   That's the spring I'm talking about.   Just so's you know....

Here are the removed metal pieces, which are ready for their spa soak.  Face plate, back plate, bobbin cover plates, tension parts (this is another section to document as you dismantle it, and/or have good manual pictures to follow), the hand wheel parts, and lots of little screws.   I kept all of the bobbin winder parts completely separate in this case.

Plop some OXO Brite into a bowl that's large enough to hold all of your metal bits, (JUST the metal bits...don't add anything that has lacquer.....and, um.....don't ask me how I know about that one either.....), add boiling water, then let your metal bits soak for 10-20 minutes.

Remove the metal bits, rinse them THOROUGHLY, then dry them - THOROUGHLY.  If you do this with SM feet (I do) or anything with tiny crevices that might hold moisture, I suggest using a hair dryer to make SURE they are COMPLETELY dry.   You know how rust happens?   

Now is a good time to go over the show pieces (face plate, etc.) with some metal polish.   Although the OXO does a pretty thorough job, if your machine is really old, the metal polish will give it that extra oomph.  

All shined up!


While everything is soaking, you can go after the gears & moving parts.  I clean up any really filthy, gunky parts with WD40.  (Don't forget to dry it well)  Then start feeding.  :)   Follow your manual instructions regarding the oil spots, but mostly it's common sense.   Just feed a drop of oil (just a drop - don't overdo it....) to any area that has moving parts that rub against each other.
Under the machine:
On top:

Inside the face plate:

Turn your wheel & feel & listen as everything starts to loosen up & glide - such a gratifying feeling!

Now it's time to start with the massage portion of the spa treatment :)   Bring out the Scratch X, & put a small dollop on your massage cloth (this is where my old tshirts live out their life):
Now, gently (don't rub hard) massage the cream on to the lacquer.   Do this on small portions at a time - maybe half the bed (or less, depending on how dirty your machine is.   Don't let the cream dry, & don't do it for too long.   This isn't scary stuff, but you can overdo it.   (I took it to its limits on a machine I knew would need a total repaint job, just to see what the limits are -- you can rub TOO hard, and you can rub too long, but it really did take some elbow grease to overdo it)   Just treat it like a gentle face cream that you don't want to use too much of, and you'll be fine.   Don't rub too hard on the decals.  Wipe it completely dry, give it a good rub to bring out the shine,  and move on to the next section.   One treatment is enough - you'll never need to do it again.

 After the Scratch X Treatment - looking pretty good!:

Next step is your wax job.   I like doing 2 (or maybe 3) coats, with thin layers of wax.   Apply wax with a soft cloth, let it dry, rub it down well.    Ahhhhh........... now you can REALLY feel and see the difference!

Put all of her jewelry and make-up back on, and she's ready to roll!
For comparison:
Before

After

Now, I just need to get a new treadle belt, clean up the cabinet, move her into her working spot, and get treadling!   I'm a bit torn about whether or not to wait until I have the time & energy to refinish her cabinet, or if I should just give it a basic cleaning so that I can get started sooner - I think I won't be able to wait....

I'll be doing a post about cleaning up Gabrielle's sister, Colette, the Featherweight, soon  (I hope!).   Feathers do have a few other steps - they're special, you know.......

Meanwhile, here's to providing good, loving homes to all our vintage orphans!

Friday, May 6, 2011

A Double Dose of Yummy!

Well, y'all may realize that I've not been finding the time or energy to be doing a whole lot of sewing lately.   So what does a non-sewing sewist do in such a case?  She buys fabric and sewing machines, of course!

I'm a reformed SMADist, really.  I am.  (for the uninformed, SMAD = Sewing Machine Acquisition Disease).  There are just a COUPLE more machines on my wish list....you know, just in case the right one comes along at the right price.  One of those was a treadle.   And if a Rocketeer fell into my lap, I would, of course, cuddle it for awhile & then happily let it follow me home.  And I always have a soft spot for a nice little Featherweight.  (it's the machine I learned to sew on under my Mother's guidance, after all).

Today there was a "Last Minute Estate Sale" with a Featherweight listed.  Kind of off the beaten path, but very close to my house.  "Everything Priced to sell!"  Since I was passing nearby while out & about, of COURSE I had to check it out, thinking the FW would be long gone if it was, indeed, 'priced to sell'.  But at $300? Nope, not priced to sell to me, but that was OK, because they had MY treadle!!!   $50.   For a Singer 66, and my second choice in treadle cabs.  Sold.  :)  (the only treadle cab I like more is very similar to this one, but the cast iron has straight legs - lovely, simple, clean lines.  Also harder to come by than this one, which is quite common).   By the time I had gone home & emptied out my car to make room for the treadle, & returned to pick it up, the FW was marked down to $200.   Twenty minutes later, I was back home with this:


The 1952 Feather (with case & just a couple of attachments), the 66, which needs some TLC, (but if necessary I'll just cannibalize the wheel & put it on another machine) and a cute little Spartan.   All for $200 - I'm OK with that.  :)  

Someone had refinished the top flap on the desk, which clearly has the potential to be gorgeous!   I think that grain is fabulous!

Next step:  decide which machines to re-home (no, I'm not admitting to how many I have....not at the moment, at least)  ;-D

And then, shortly after getting home, my Fabric Mart box arrives!   Best.  Box.  Ever!

Even His Furriness the Inspector General is in full approval of this one.  Pigskins, sheep shearling, silks, linens, rayon knits, waterproof stuff....& a couple of mystery bits in the freebie bundle (like that lime green twill in the corner.....anyone love lime green?  Because lime green lover would not be me.....)

I've never been this thrilled with a box of fabric in the mail!   Now then.....to sew, to sew.......   Right after I pay the bills.  & go to the post office.  & grocery shopping.  & the bank.  & make dinner.   & get ready for work tomorrow.   & do all the Mumsy stuff.  Oh.  Yeah, right.   All that is why I haven't been sewing.   Maybe next week?

But first, give me a minute......I need to go coddle some pigskin & stroke some silk..........

Oh!  I almost forgot!   The bonus score from the estate sale - a pile of vintage buttons!!!  (Have I ever mentioned that I'm a bit of a button freak? - especially vintage)

Of course, with a pile that size, there are bound to be a few really cool buttons.  Here are a few of my faves:
I love mixing buttons, so the fact that scores like this rarely yield duplicates of the really unusual ones is OK by me :).   What's with the Roosevelt pin, you ask?  It appears to be a real, vintage, pin.   Not a super-valuable one, but apparently worth more than I paid for the buttons!  Kinda cool.  :)